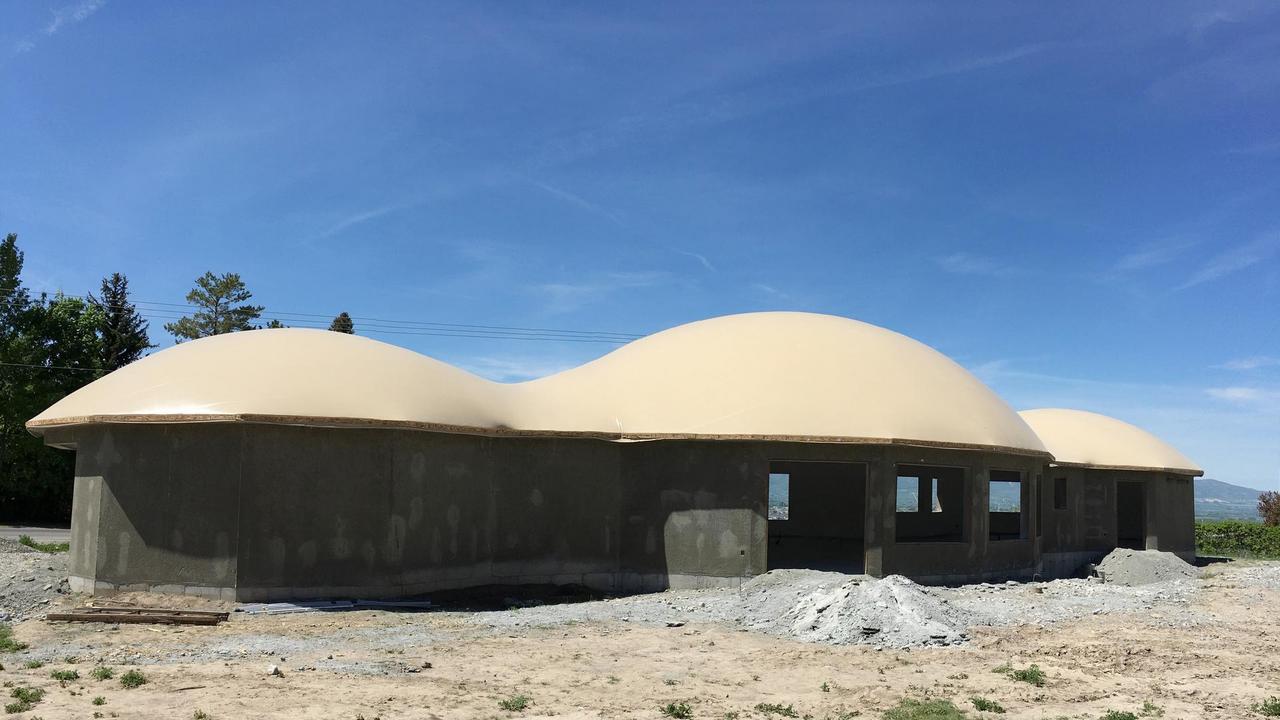
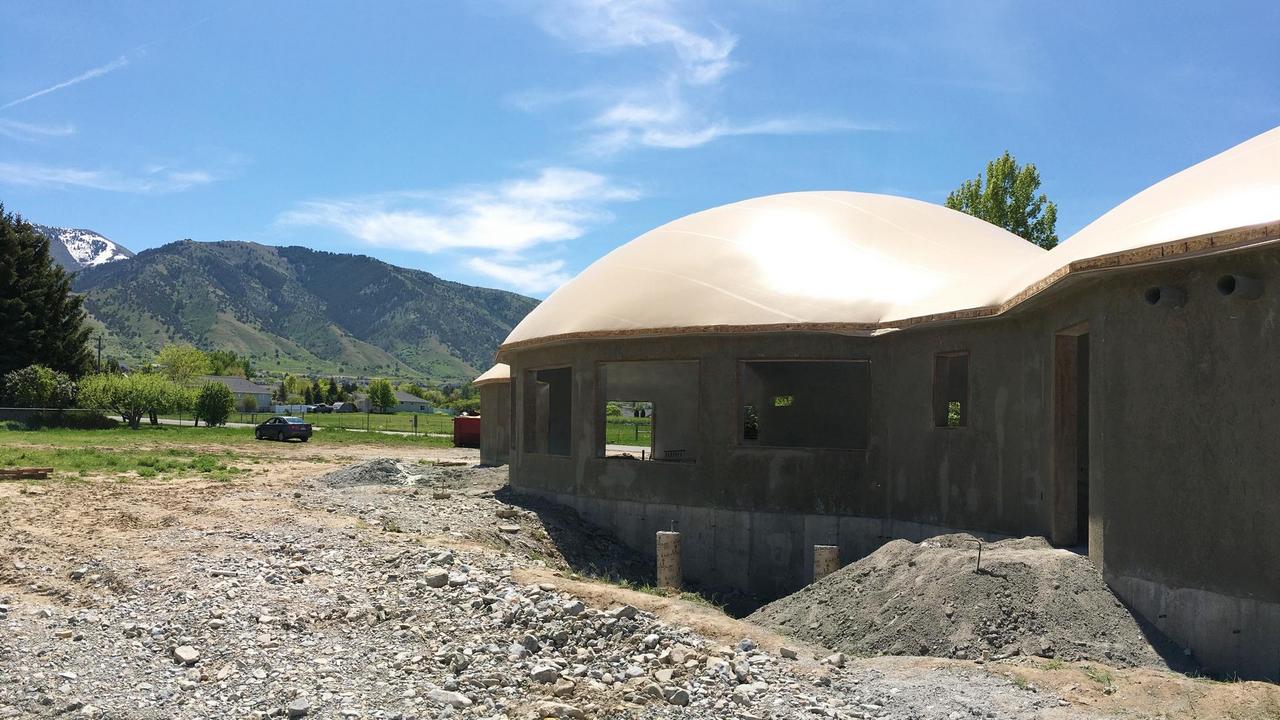
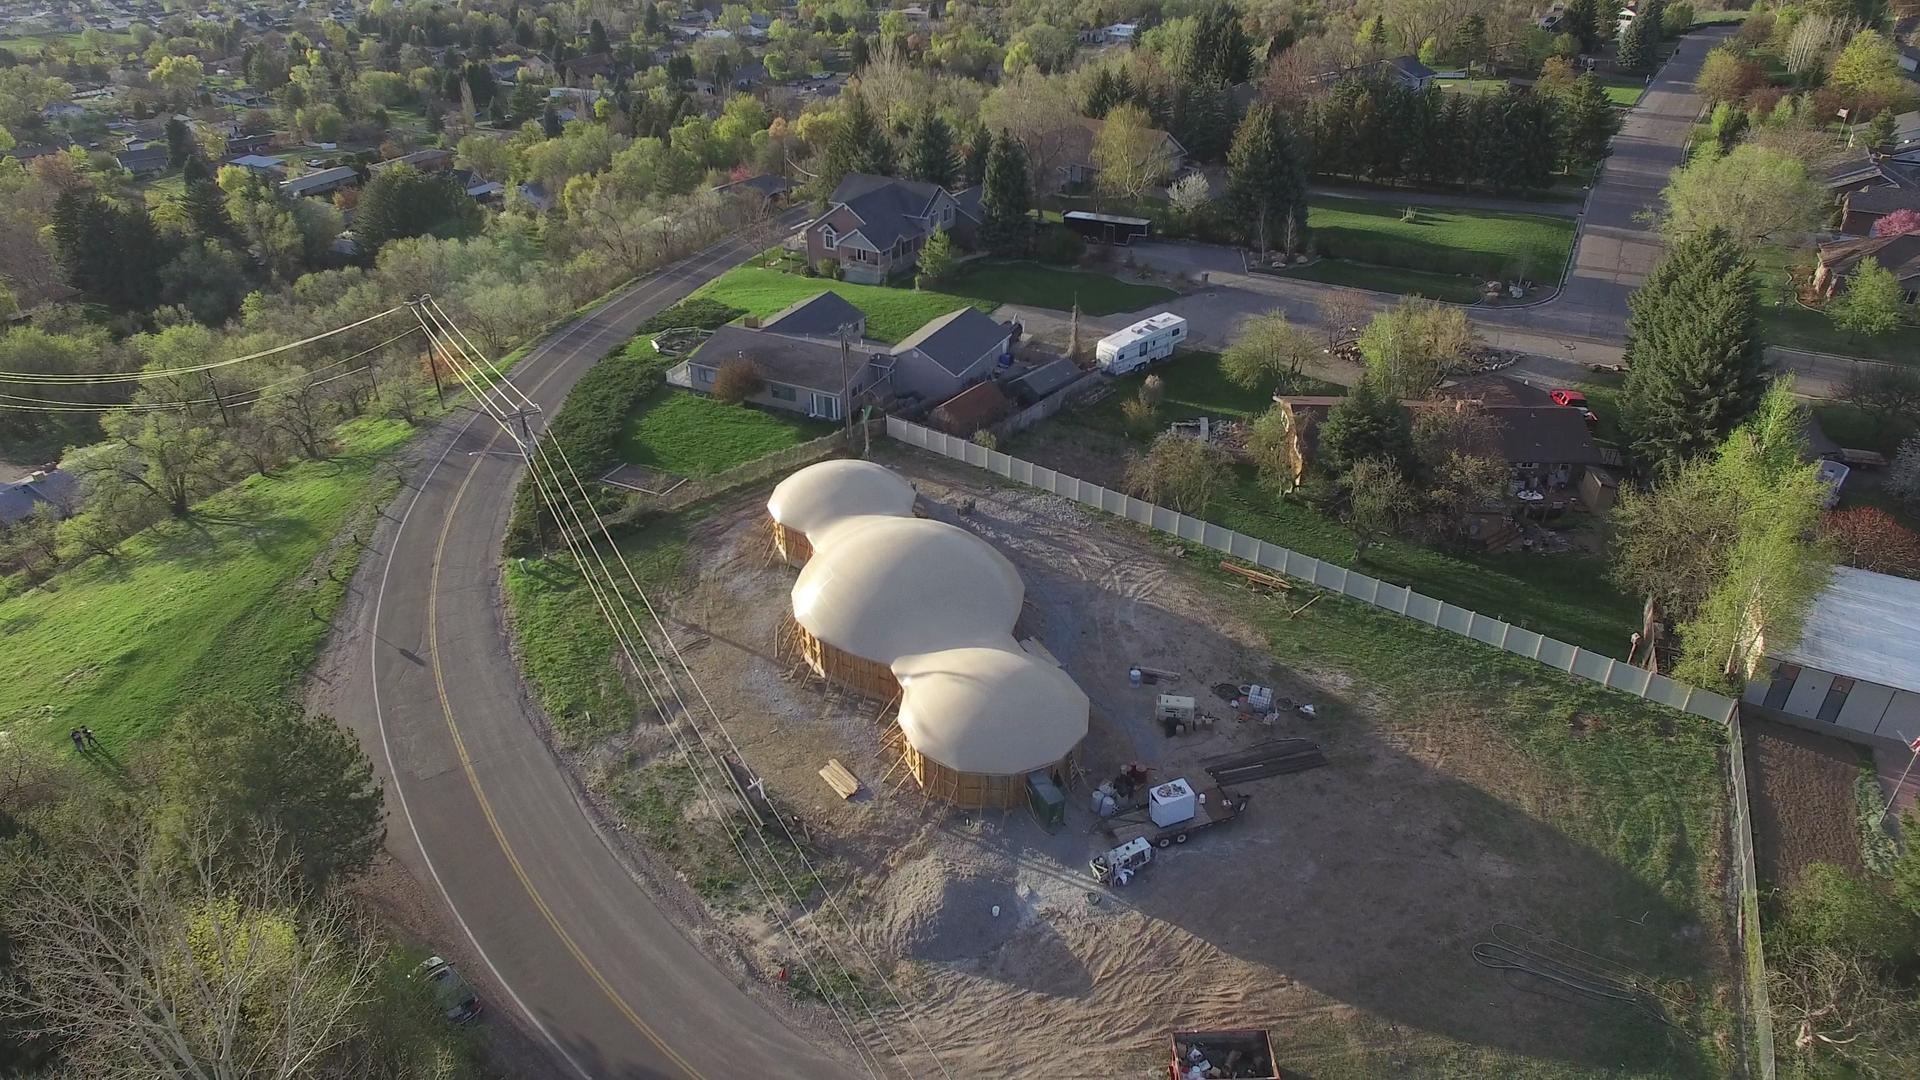
Shell Complete for Arcadia Monolithic Dome Home
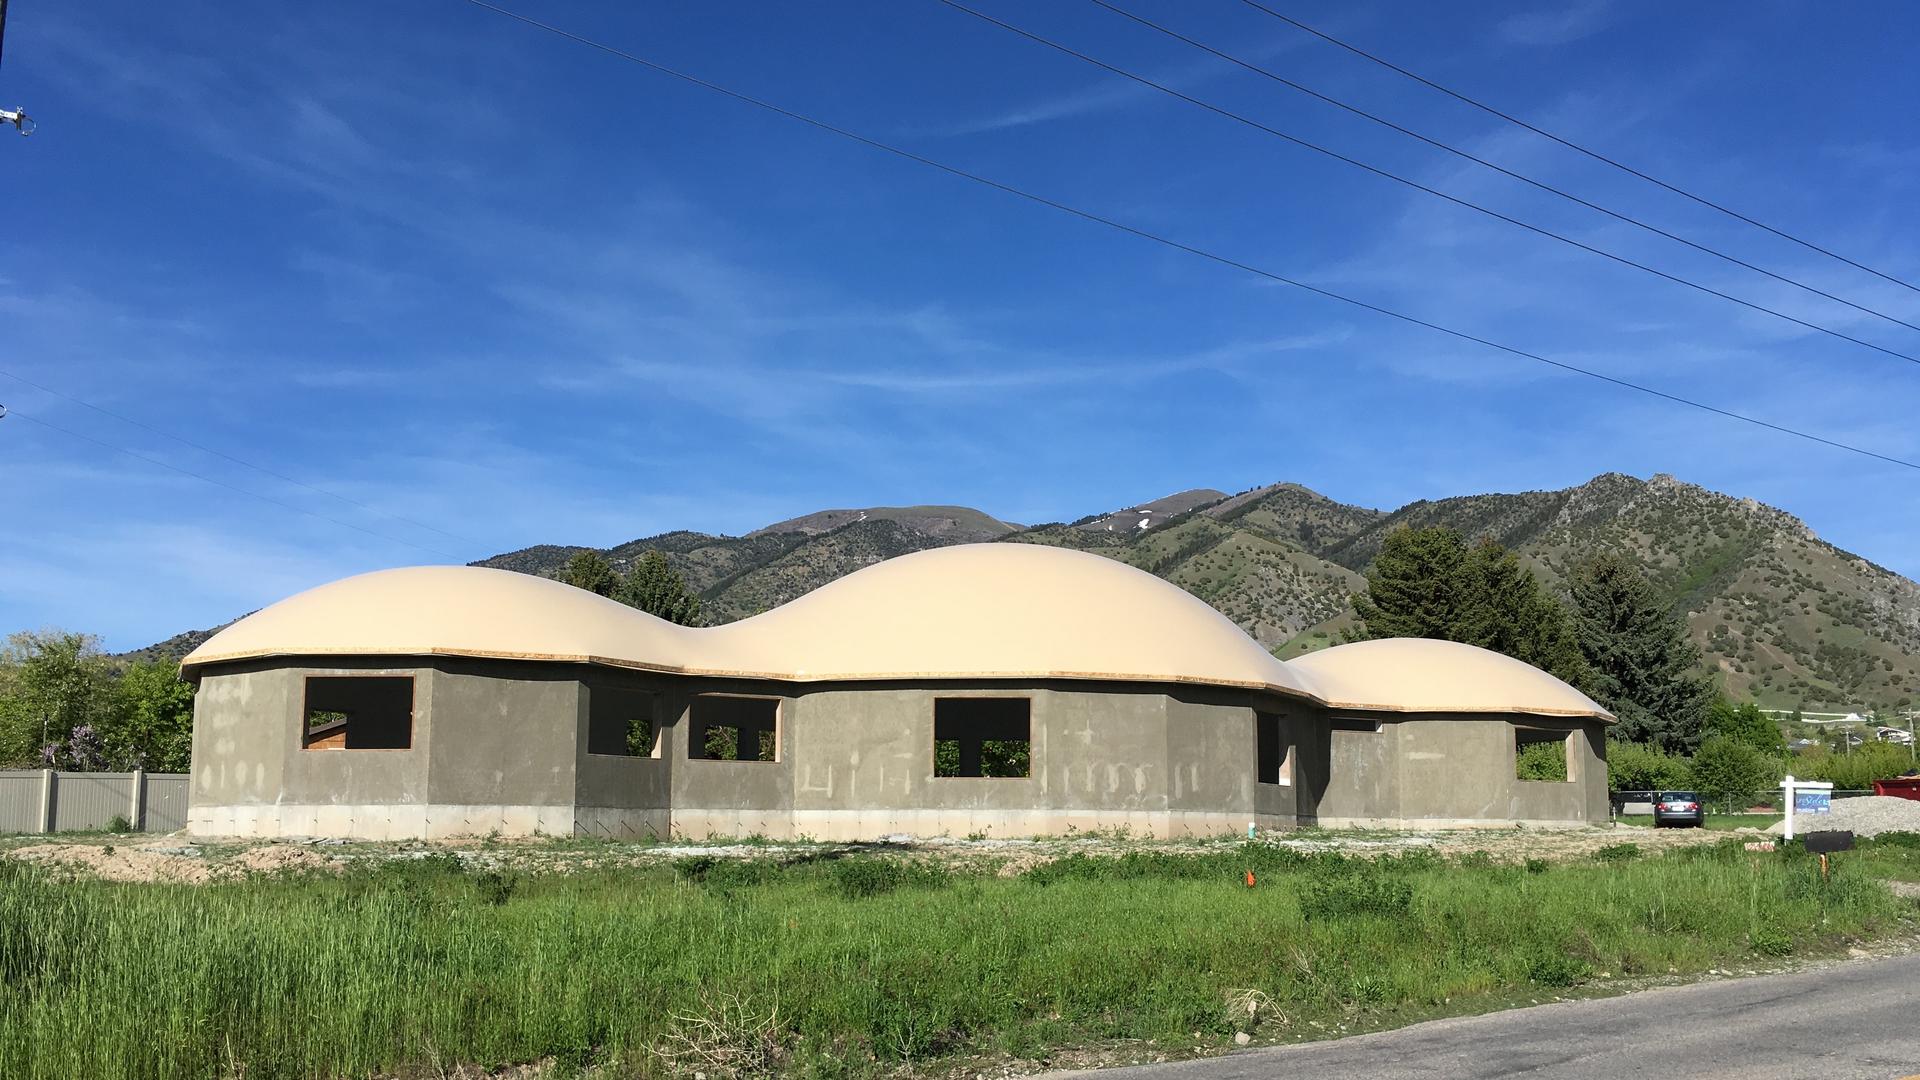
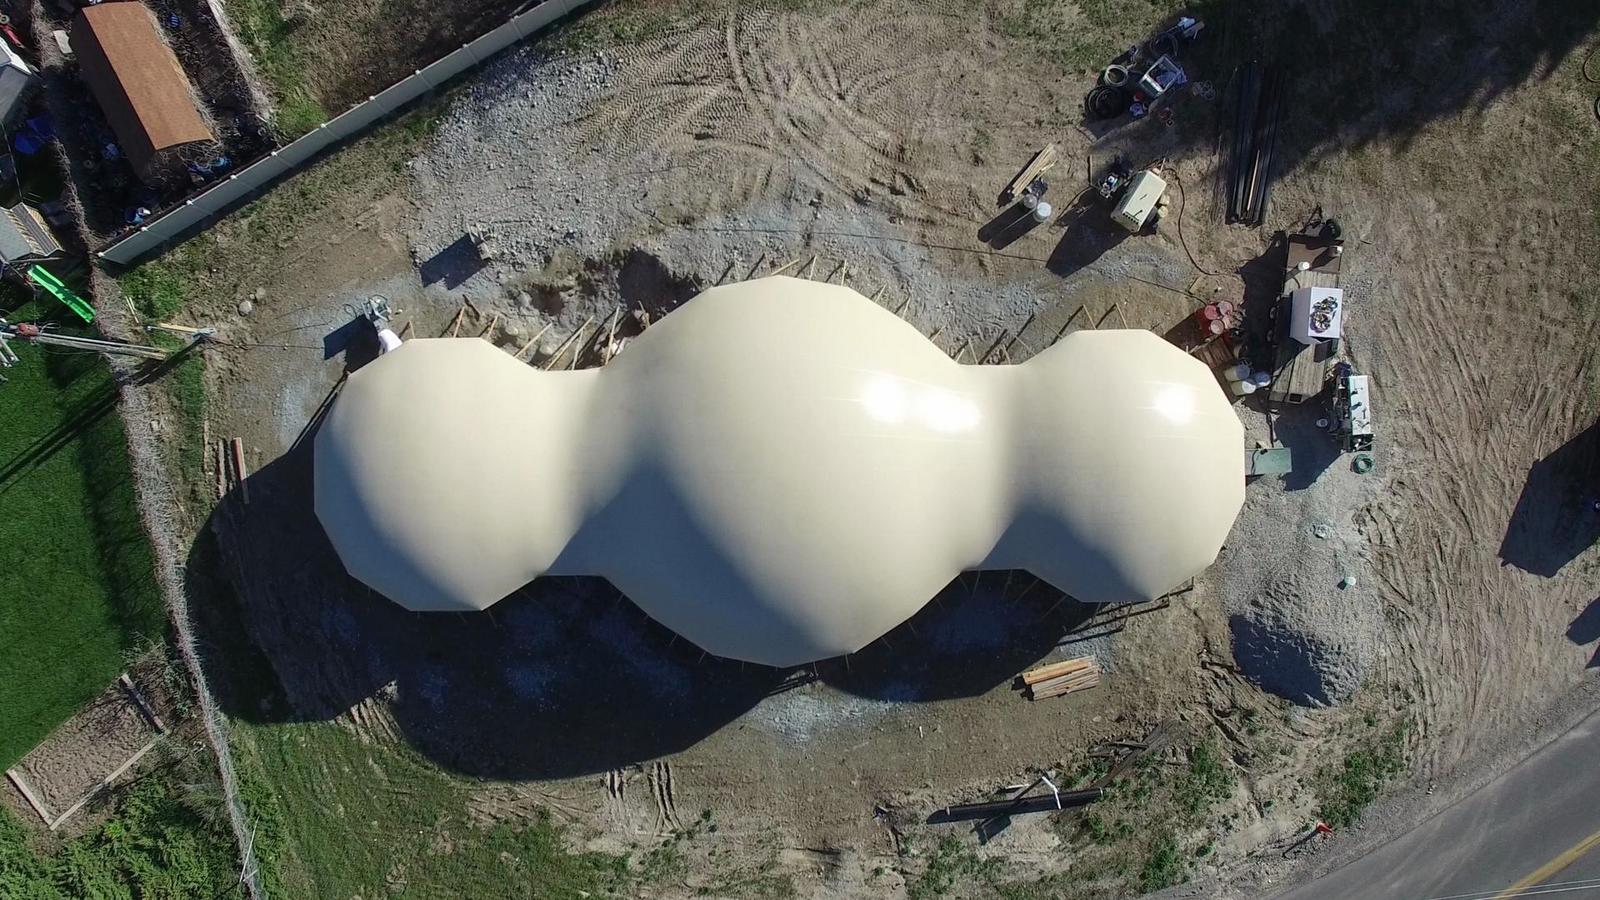
Finished Monolithic Dome home shell on the south bench of Providence, Utah. The house is named Arcadia.
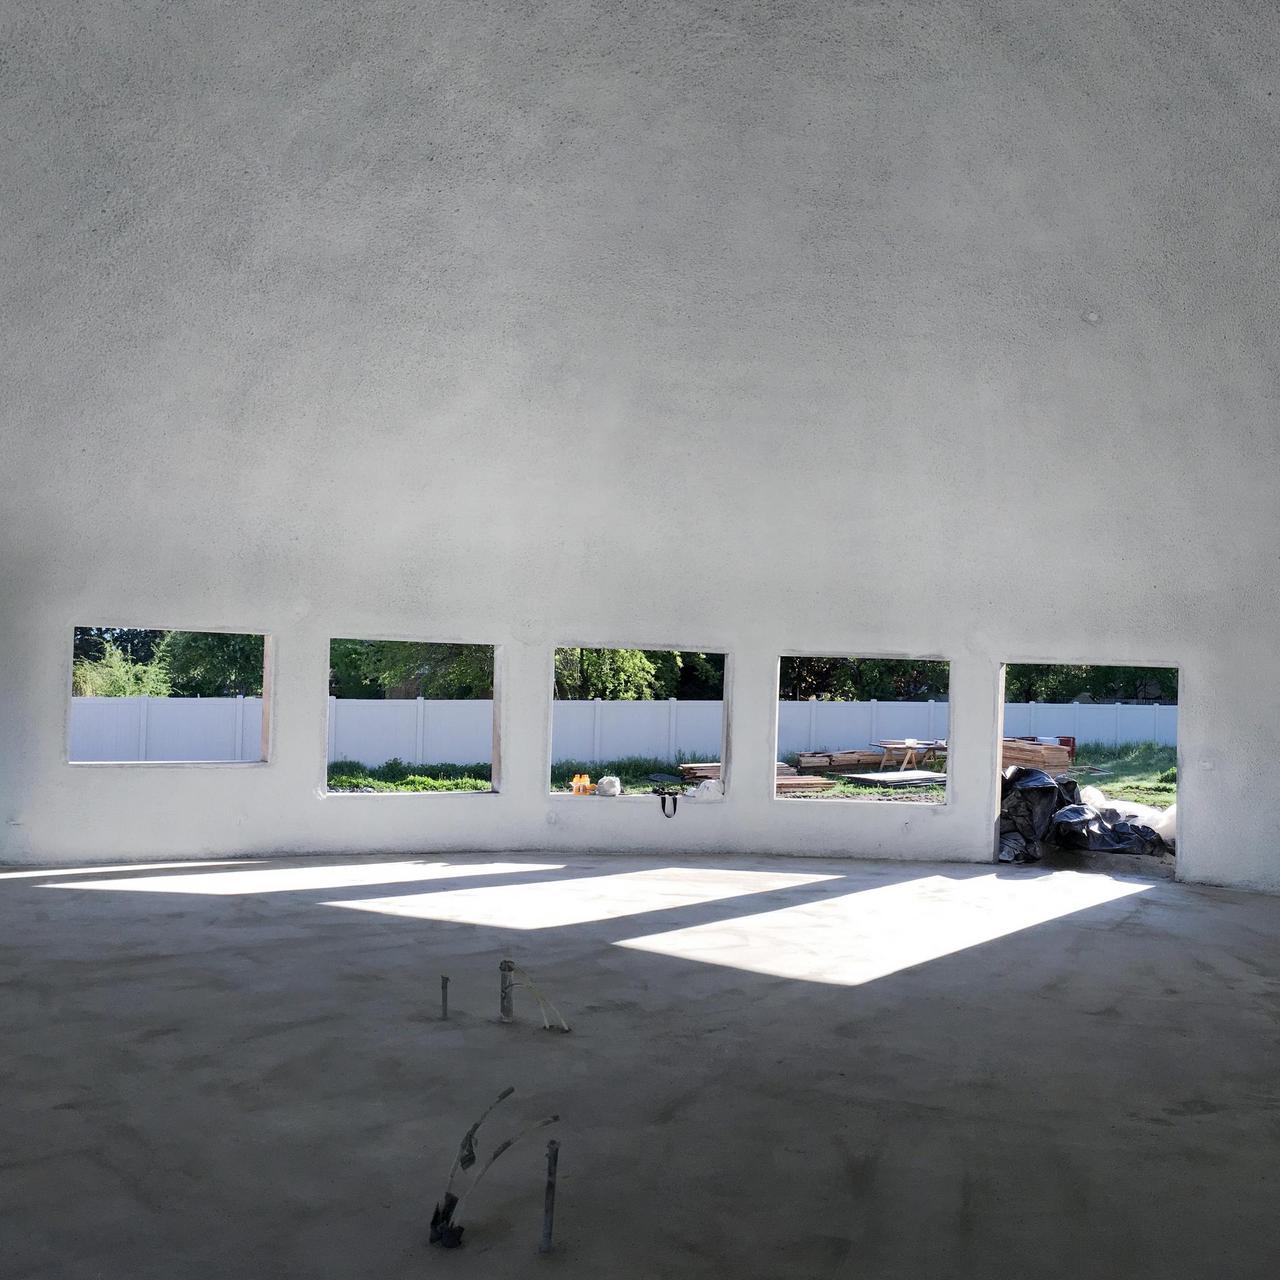
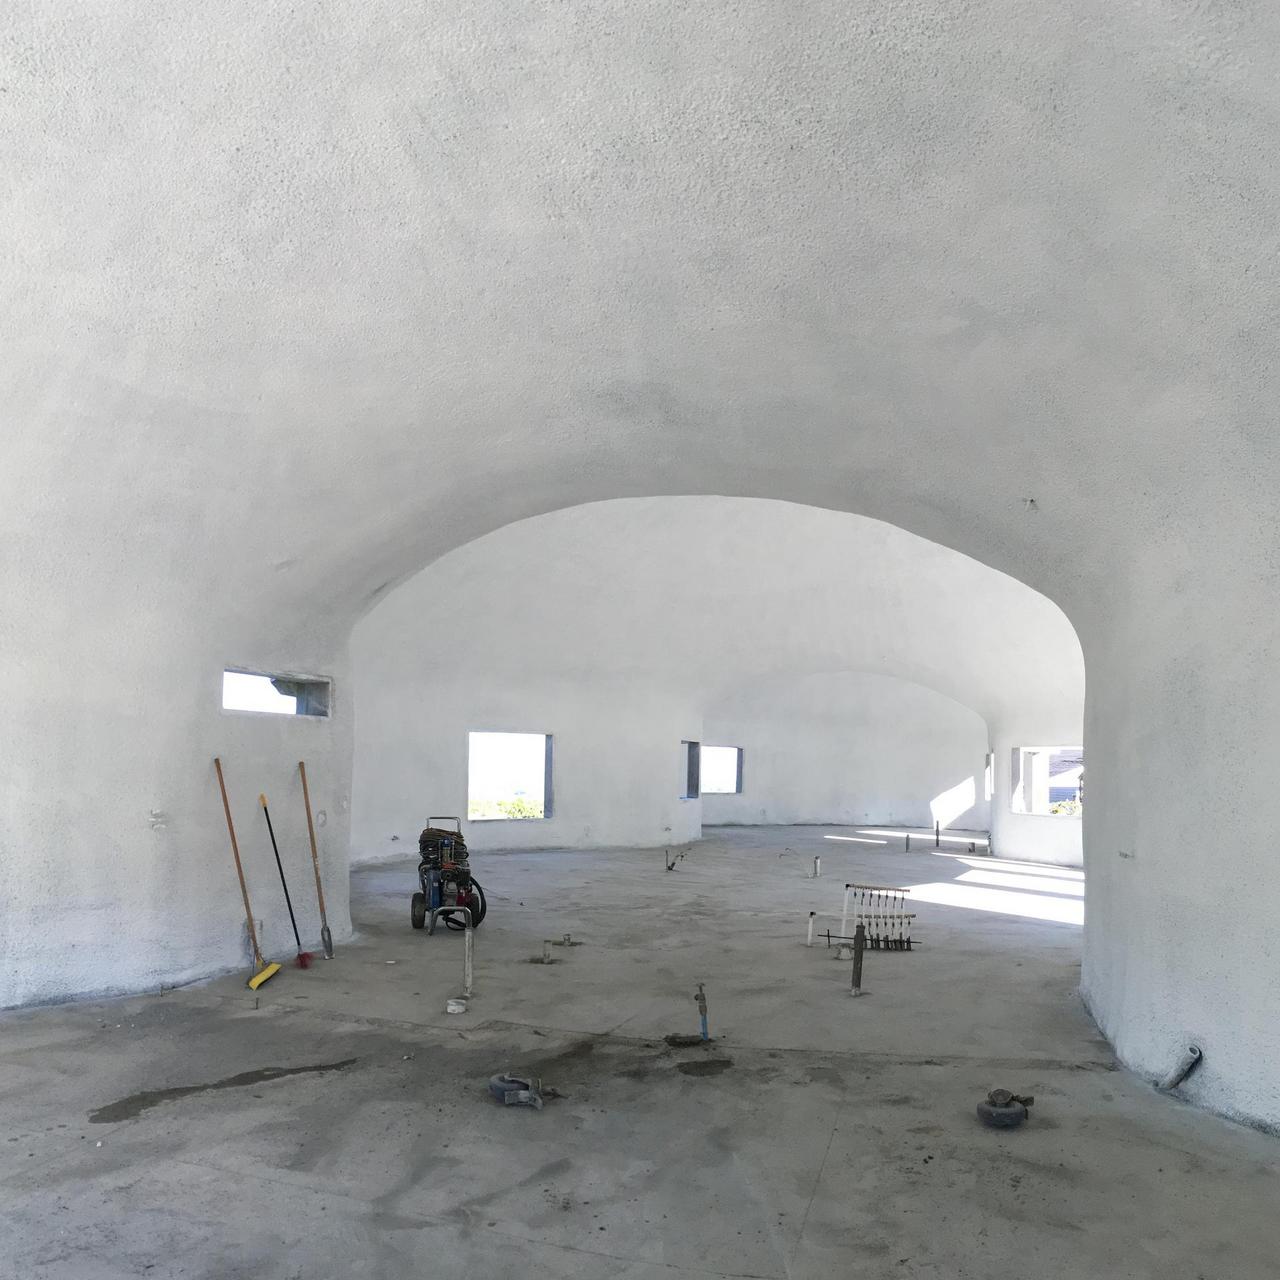
The concrete thin shell is complete for our new Monolithic Dome home. Javier, Hector and Jose did a fabulous job. They finished painting the interior last week and returned to Texas. It’s been a long process to get this dome built and now that it’s set in concrete (literally), we love it. It’s time to start work on the interior, but before we begin, let’s talk about how we got here.
We love domes
I’ve spent twenty years of my life living in a dome. My wife and family spent ten years in one. Nothing performs like a Monolithic Dome. It raises your expectations. We moved to Utah in 2006 and lived in “traditional” housing this whole time. It’s frustrating, feeling the cold walls in winter or knowing the house will absolutely burn to the ground if there is a fire. It’s one thing to talk about energy efficiency or safety, it’s another to feel these benefits in action—every day.
Three years ago my wife tells me she’s been looking for land to build a dome. I laughed. I’d been looking, too. We had both—independently—decided it was time to return to Monolithic Dome living.
The Word Picture
When designing a house—any house—it’s best to start with a Word Picture. It’s a written description of everything you want in your house. They are not terribly hard to write. Start with the big stuff—how many bedrooms, bathrooms, and other rooms. We wanted four bedrooms, two and a half or three bathrooms, a kitchen / great room, a connected garage, etc.
Refine the word picture with real-world measurements. Bring a tape measure everywhere you go. Measure bedrooms, bathrooms, kitchens. Internalize how much space is needed for a given activity. When drawing something on paper, it’s easy to skew things too big. Bedrooms, for example, are often oversized. Save that space for other areas.
Describe each room and how many square feet you think it needs. Add details like “I want this window to look over the yard” or “the walk-in closet should open into the bathroom.” Rank various rooms and design features by importance. This information is invaluable to the designer.
Our word picture took a while to polish, but it was worth the time.
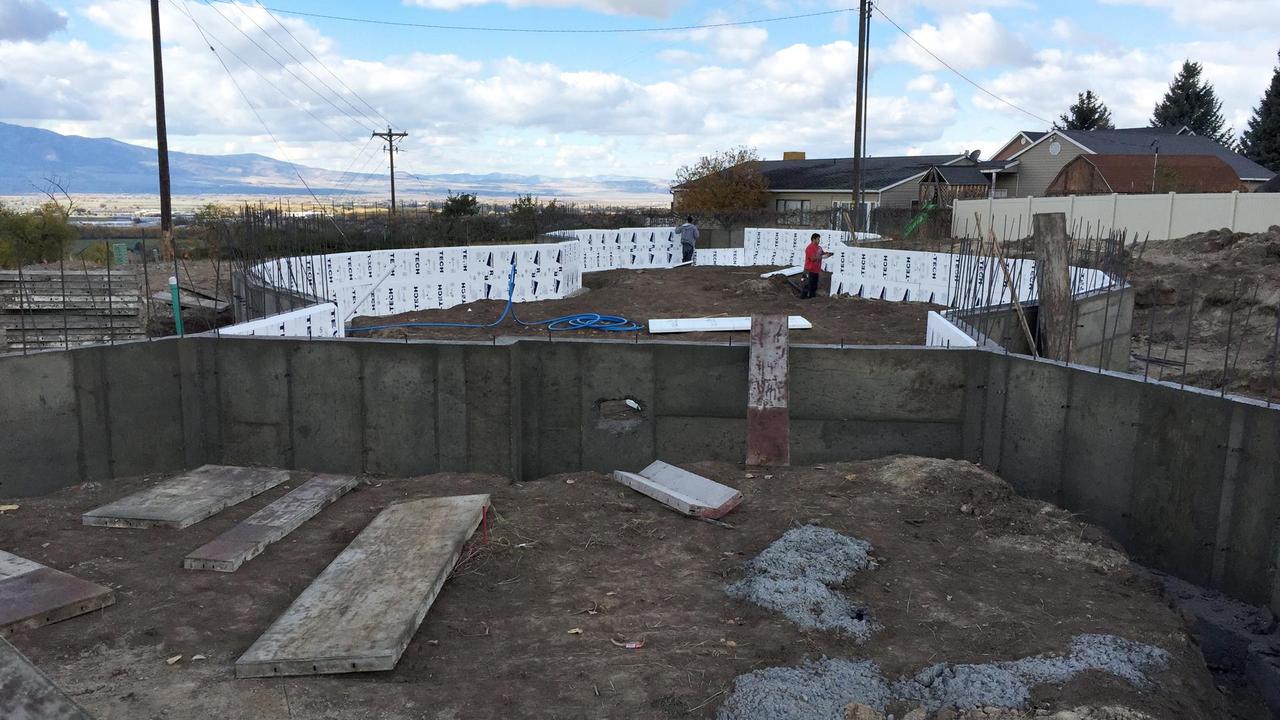
Foundation walls form the outline of the home. A worker lines the interior surface with foam insulation. A dividing wall separates the garage from the house.
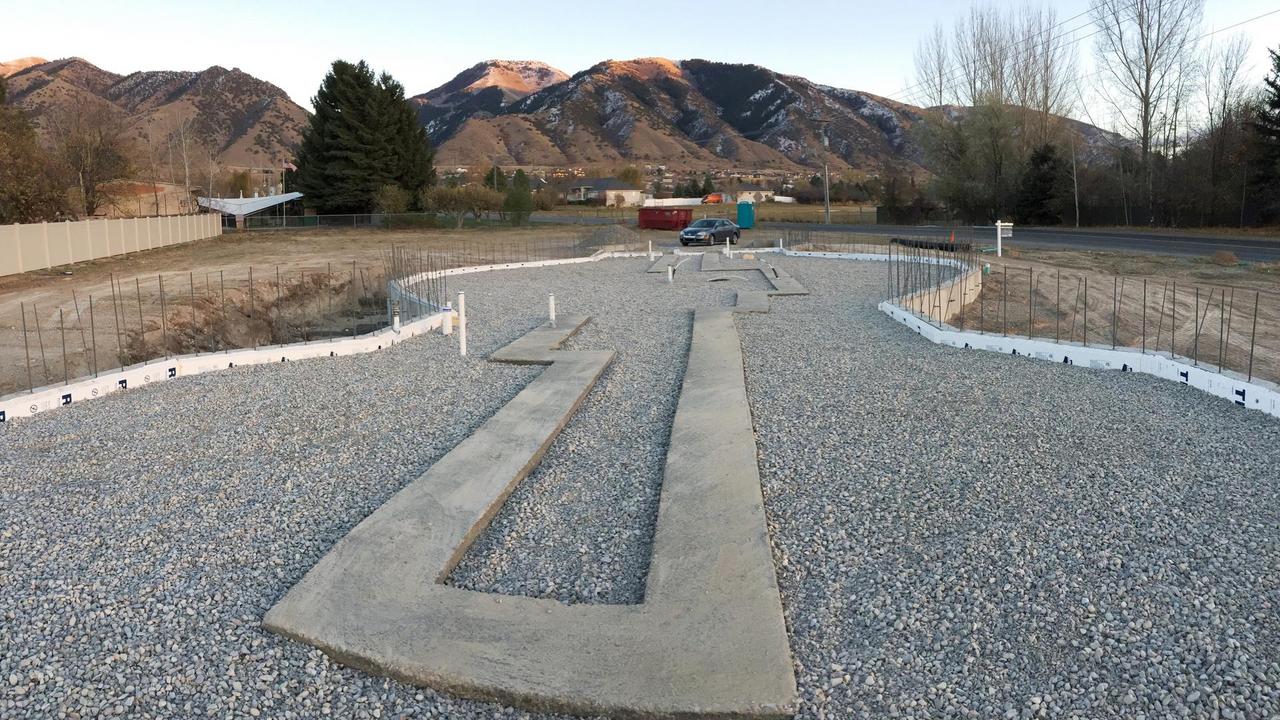
The foundation walls are filled in with soil and then gravel. Note the internal bearing wall foundation.
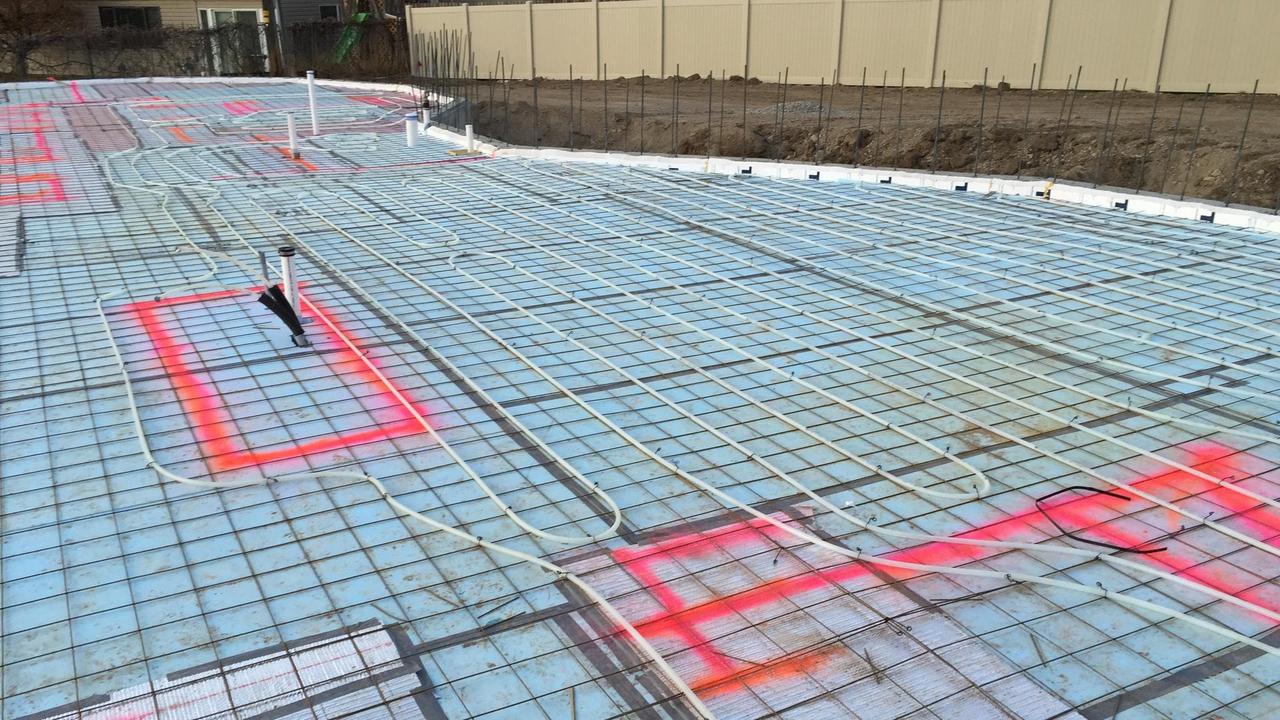
Arcadia will be heated by a radiant floor. Insulation foam boards are laid over the gravel then loops of water lines are placed throughout the home.
The land
You cannot design a house without knowing where it will be built. Without land, the process is academic. The land also determines the type of house you are allowed to build.
- Planned unit development—townhouse or condominium
- New subdivision development—builder specification home
- Individual parcel or acreage—custom construction
Construction and land prices are linked to control. An affordable townhouse has the least control. You might be able to put a separate shower in the master bathroom, but the developer designs everything else.
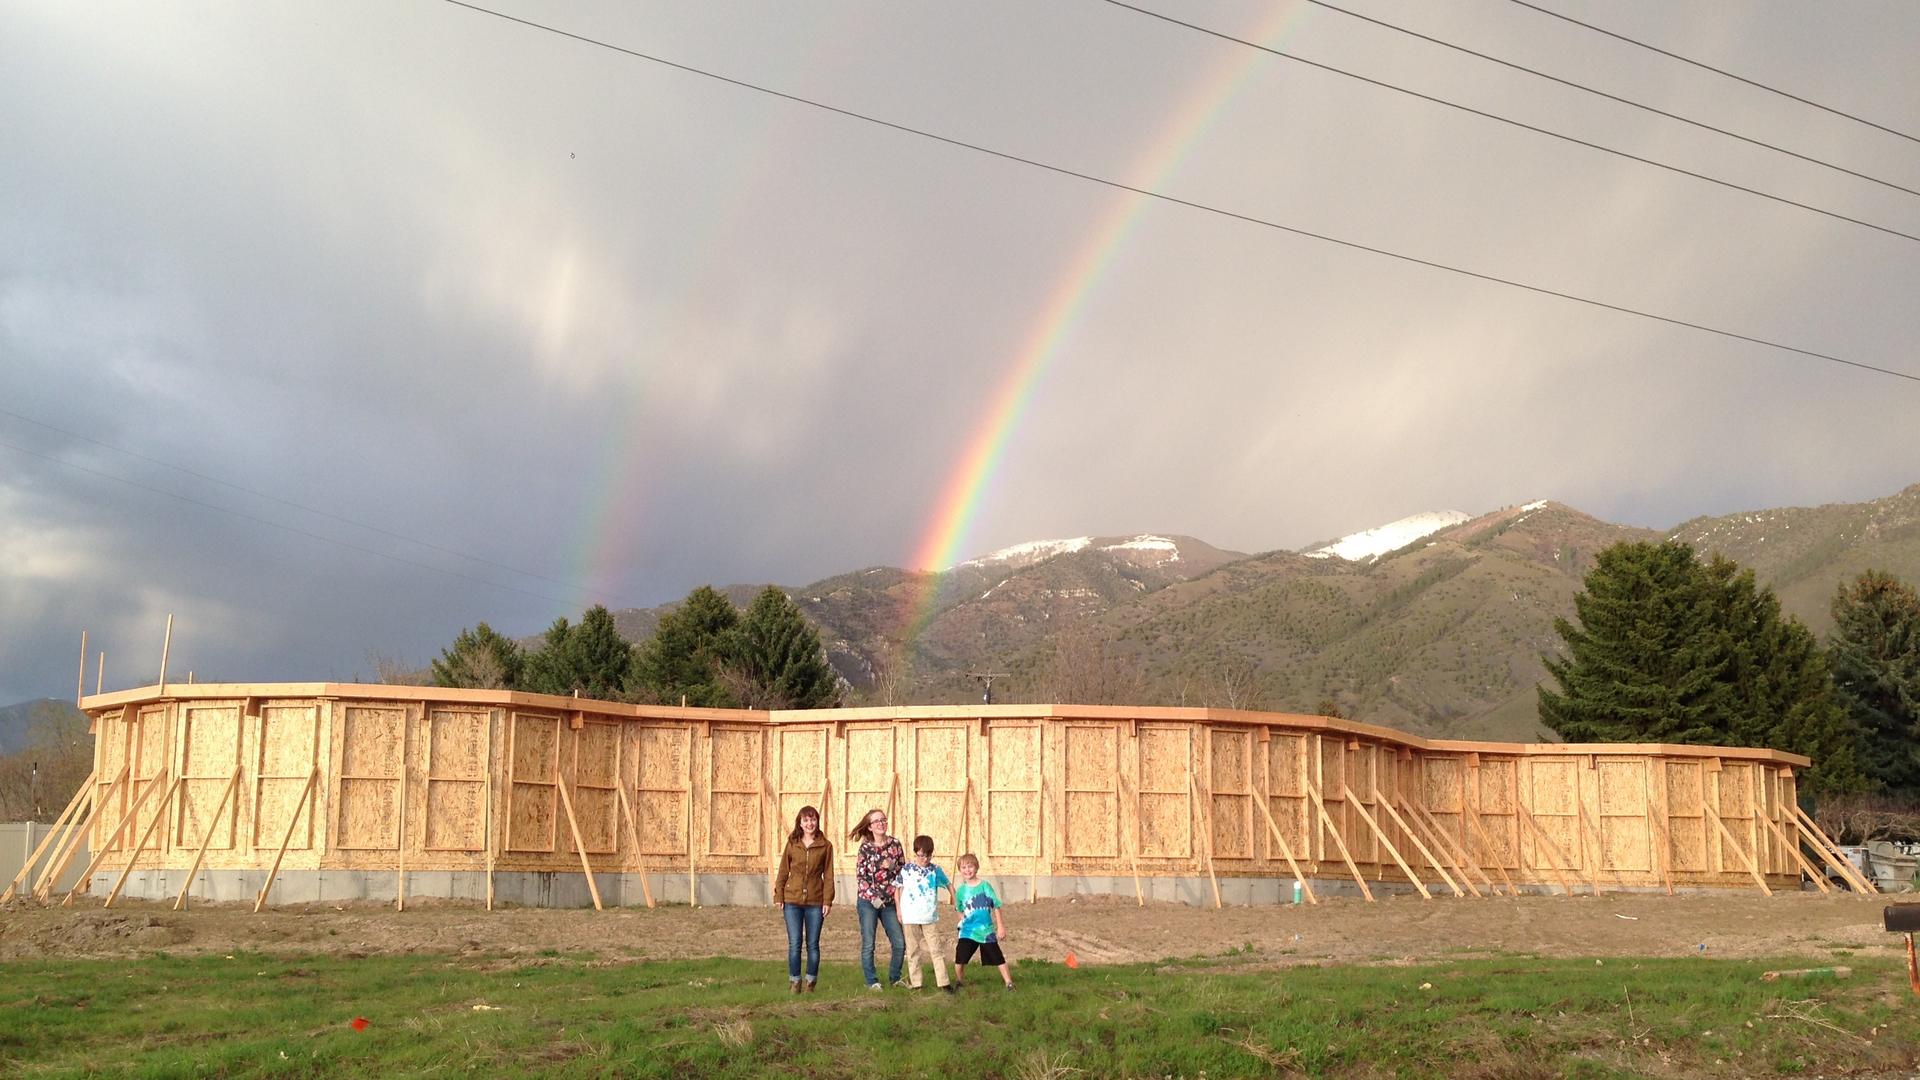
A rainbow shines over the construction site while Amy, Aubrey, Sam, and Tom celebrate the next step of construction—the plywood forms used to construct the outer wall.
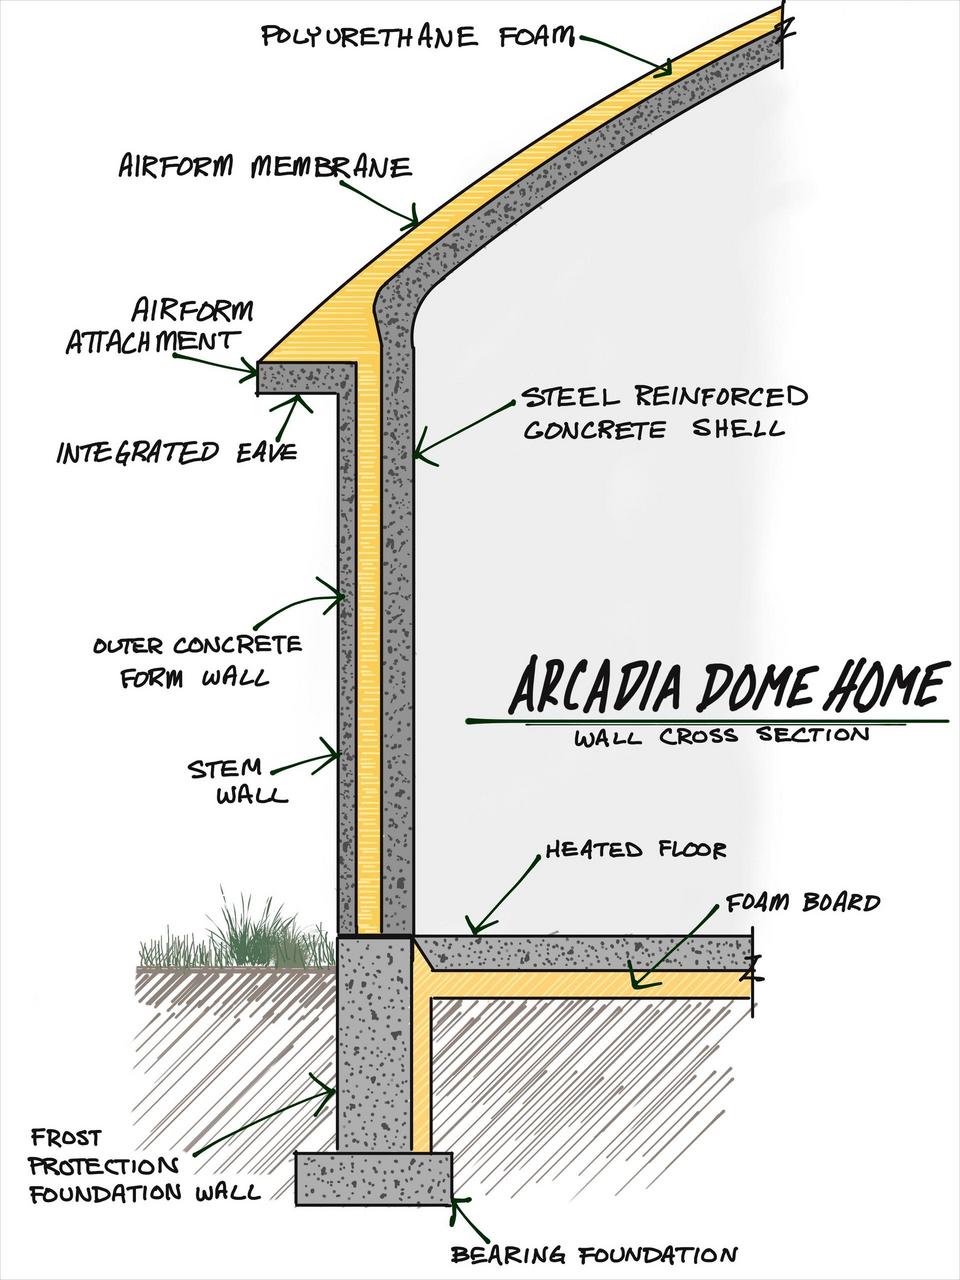
Diagram of the wall cross-section for Arcadia. The stem wall and eave are formed with plywood and shot in place with concrete. The Airform membrane is attached and inflated. The foam and structural concrete are applied in successive layers.
Subdivisions offer more variety, but you still must agree to architectural covenants and restrictions when you buy the land. These binding restrictions ensure your house is guaranteed to be similar to the neighboring homes. Developers want everything the same to “preserve the value” of the subdivision.
For a truly custom home, we must look for individual pieces of land. There are acres of beautiful rural land surrounding Logan, Utah. Neither Jennifer nor I wanted to manage a large plot of land.
There are smaller plots of land available in nearly every city that are orphaned or undeveloped. It takes more effort to find, but it’s worth it. We looked all through Providence, Utah (our preferred town) and the areas surrounding Logan. We finally found a half-acre plot on the edge of the mountain bench in Providence. It was part of a 1970s subdivision but was isolated legally by a tiny strip of land between it and the road. No covenants or restrictions were on record.
The owner had died and the kids were just trying to sell it. We offered their asking price and it was accepted the same day. As part of the deal, they negotiated, bought, and included the tiny strip of land isolating access to the property. This enlarged the property from a half acre to nearly two-thirds of an acre. By the time we closed, three better offers were made for the land.
Financing
Yes, it’s time to start designing the house, but before we begin, we need to work on financing. Custom construction is not a favorite with banks. Especially after the 2008 crash. We needed to build a relationship of trust with a bank if we were going to build any custom home—let alone a concrete dome home.
We have a good credit rating. It’s something we managed to keep clean, even when times were tough. The bank we chose to finance buying the land is locally owned and often writes its own loans. They have more flexibility than national banks. This was key for our eventual house loan with the same bank. Start talking to local banks. Make it a habit to stop in and talk to the loan officer. Show them you are sincere. Give them every reason to trust you.
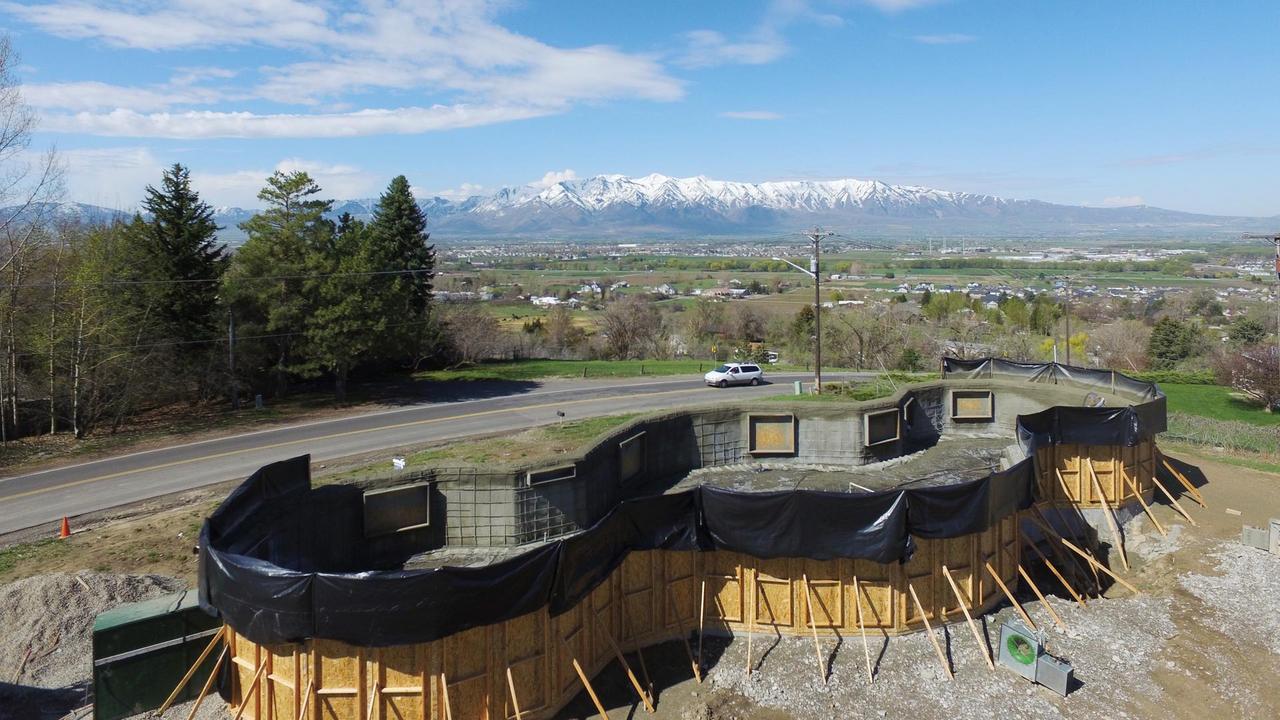
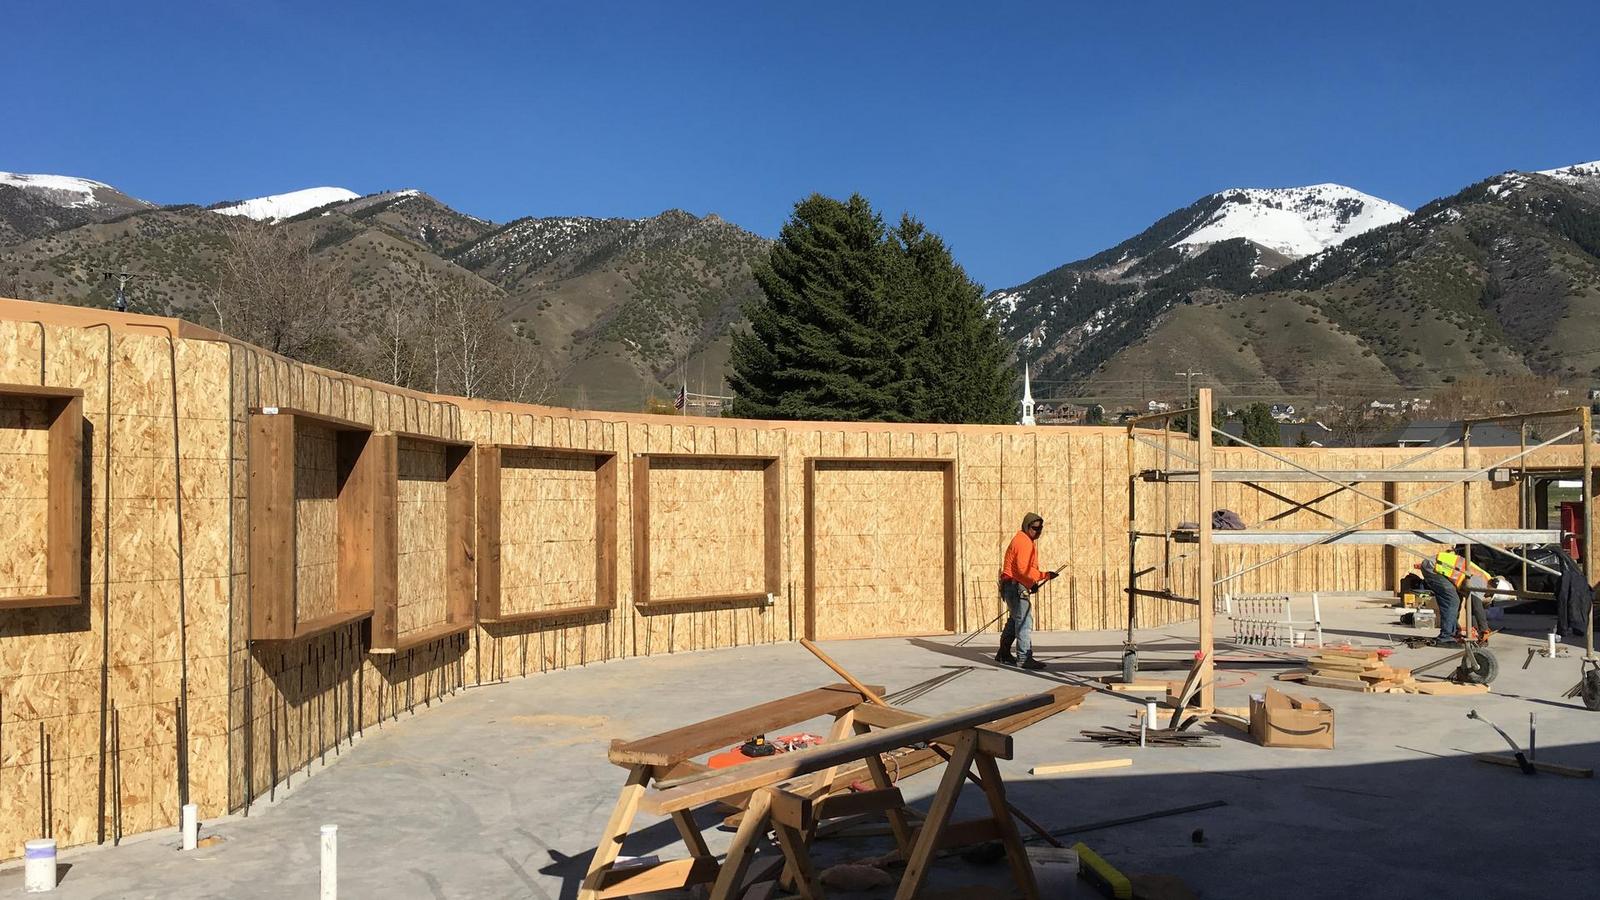
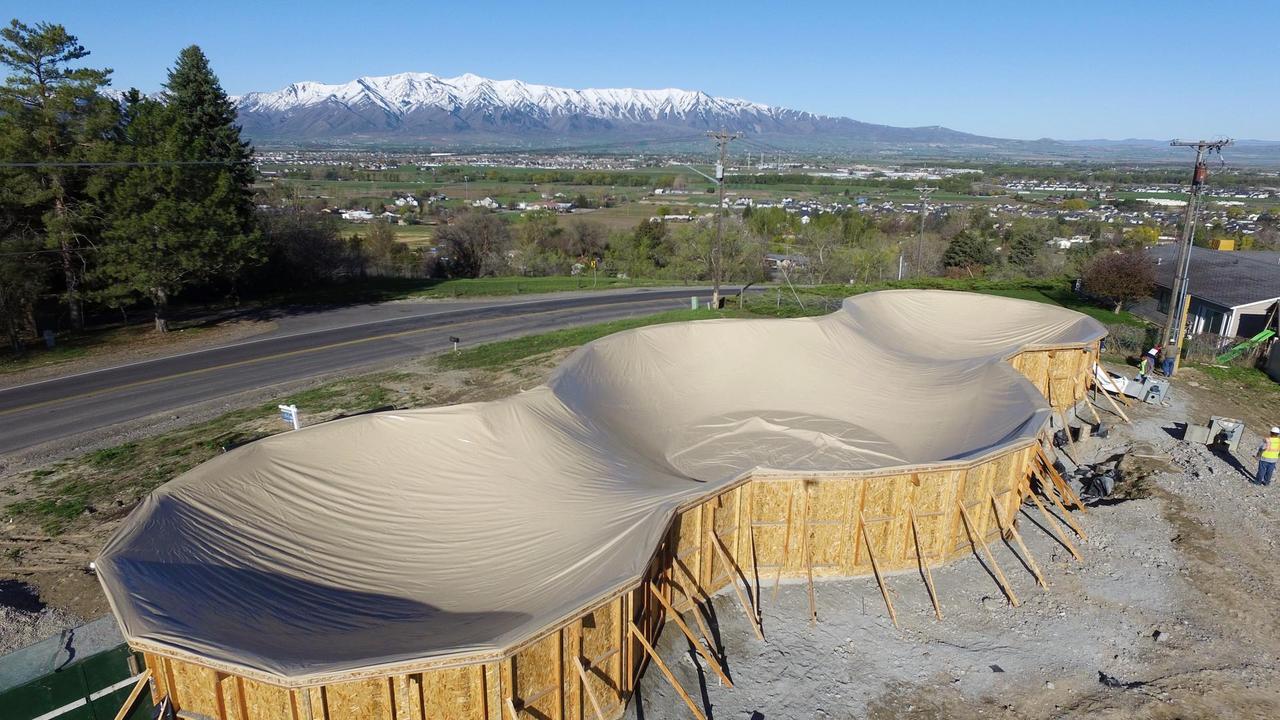
An aerial view of the outer wall in mid-construction. Steel rebar was attached to the plywood form then shotcrete was applied in layers. The black plastic helps limit overspray. The finished outer concrete layer will be about 2 inches thick.
Design
The land was wide and shallow. Maybe twice as wide as it was deep. It was on a curve on the main road coming down from the mountain. As it passed our house, it sloped down on the west side of the property. It then curved north and sloped more downhill into the valley. There is a beautiful view to the southwest. To the east is a view of Logan Peak and to the southeast a view of Millville peak.
Providence city required a 50-foot setback front to back with 20 feet minimum. What does that mean? It means we could put the edge of the house 20 feet from the back property line, but we needed 30 feet of property in front. Or we could have 20 feet in front and 30 in back. Or any combination over 20, but adding up to 50. I agree with setbacks. It makes nice neighbors and gives traffic enough distance to safely drive in front of your house—especially one with a curve like we have.
The setback also meant our actual usable space was 50 feet less deep than the already shallow property depth. The curve meant we needed to put our driveway on the eastern half of the property. We wanted the house situated to best see the views.
Now we see that house design is dictated by land. The garage must be on the east side of the house. The views dictate window locations. In fact, nearly every aspect of our house design integrates our Word Picture to fit the land.
For example, we wanted a large great room. At first, we put it on the southwest side of the house, to see the view. However, many people drive by the front of the house and would see into our living room. The sun bears down on the southwest in the late afternoon—after school and work. We drove by neighboring houses that put large windows to the southwest and found they were mostly covered in the afternoon.
Are we going to sit in the living room just to look at the view? What do we actually do after school?
We play in the backyard!
We flipped the house. The great room and the bank of windows face the backyard. A covered porch was added. The area in the back will be obscured from drivers by the house itself. This is our afternoon hang out. We live in this space.
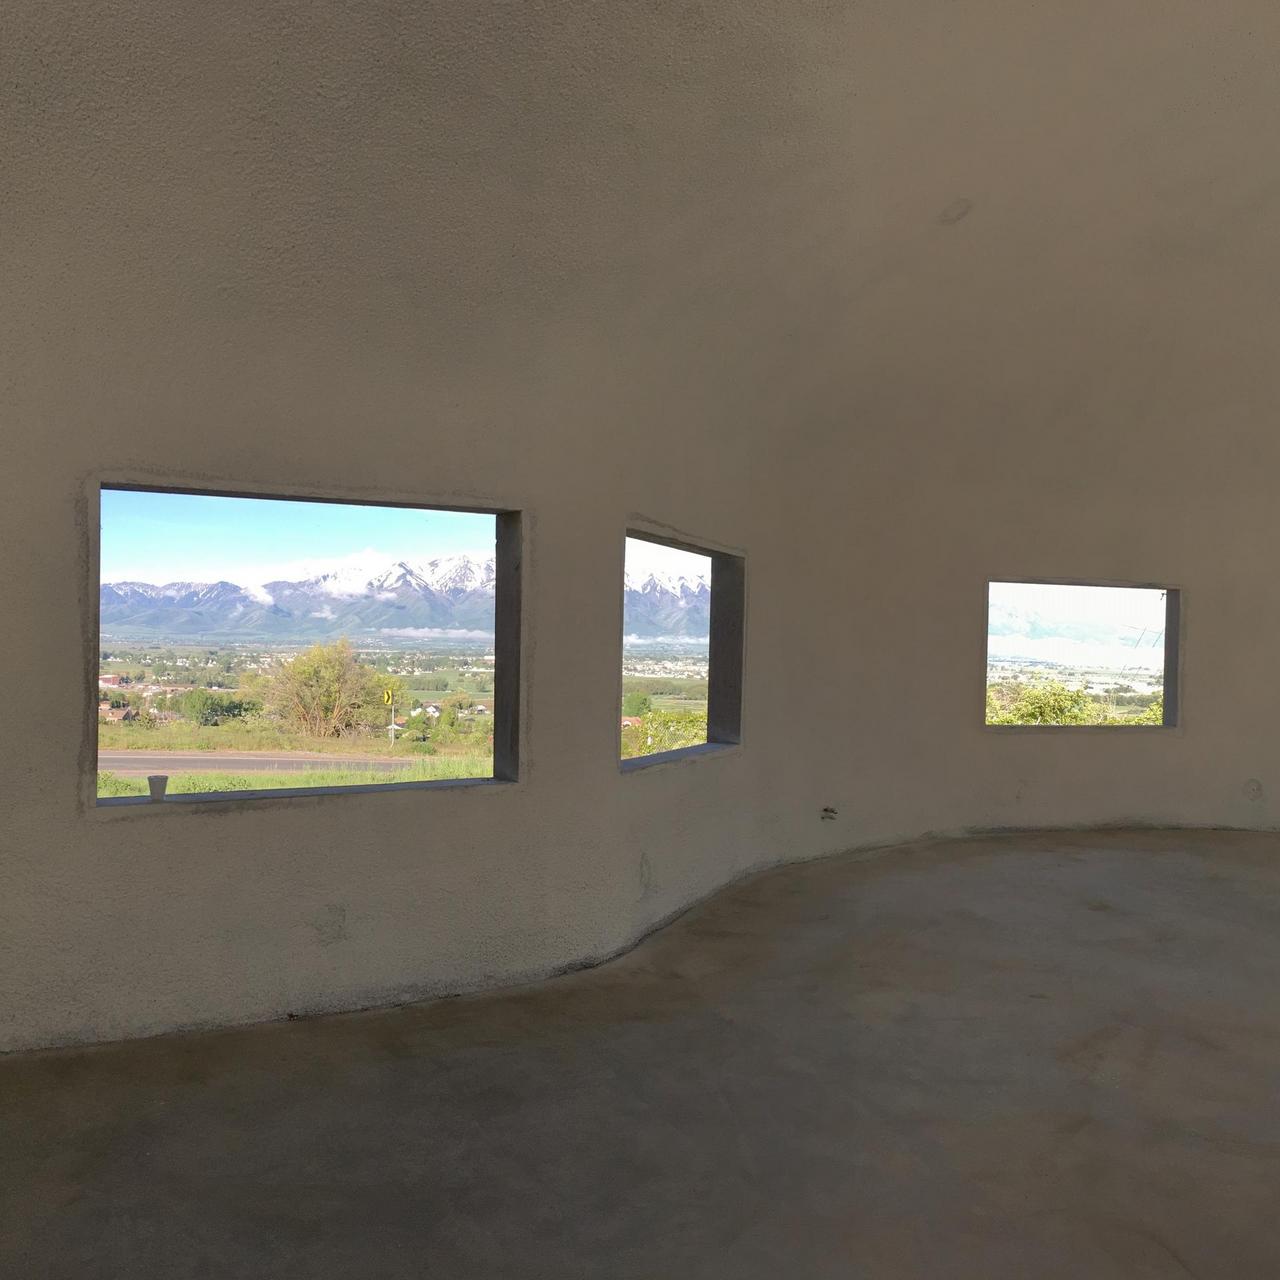
So what about the view? We made a quiet room—called the Sun Room—that faces the best view directly. It’s meant for daytime use when the sun is high, not shining through the window. Or late in the evening when you want a quiet place to read or talk. We also designed a den and three bedrooms that can see the view as well.
But it meant we had to make one important change. The house is flipped. The back is the front and the front is the back. We couldn’t fit a “front” door facing the road. Instead, we created a main door into the great room and aimed the door at the driveway. We will create parking places and landscape the home to invite people to the main door.
Well, except solicitors. We would like to direct them around the “front” of the house and have them just keep on walking down the hill.
General Contractor
Banks do not like do-it-yourself projects—no matter who you are. Custom construction is their riskiest bet. It pays to make them comfortable. We found a general contractor (GC) in Logan, Lifestyle Homes, who is not afraid of unusual buildings. Moreover, they have experience with custom construction and the bank is confident in their work.
After our design was mostly complete, the GC had it all priced out by subcontractors. It was this package we presented to the bank for financing.
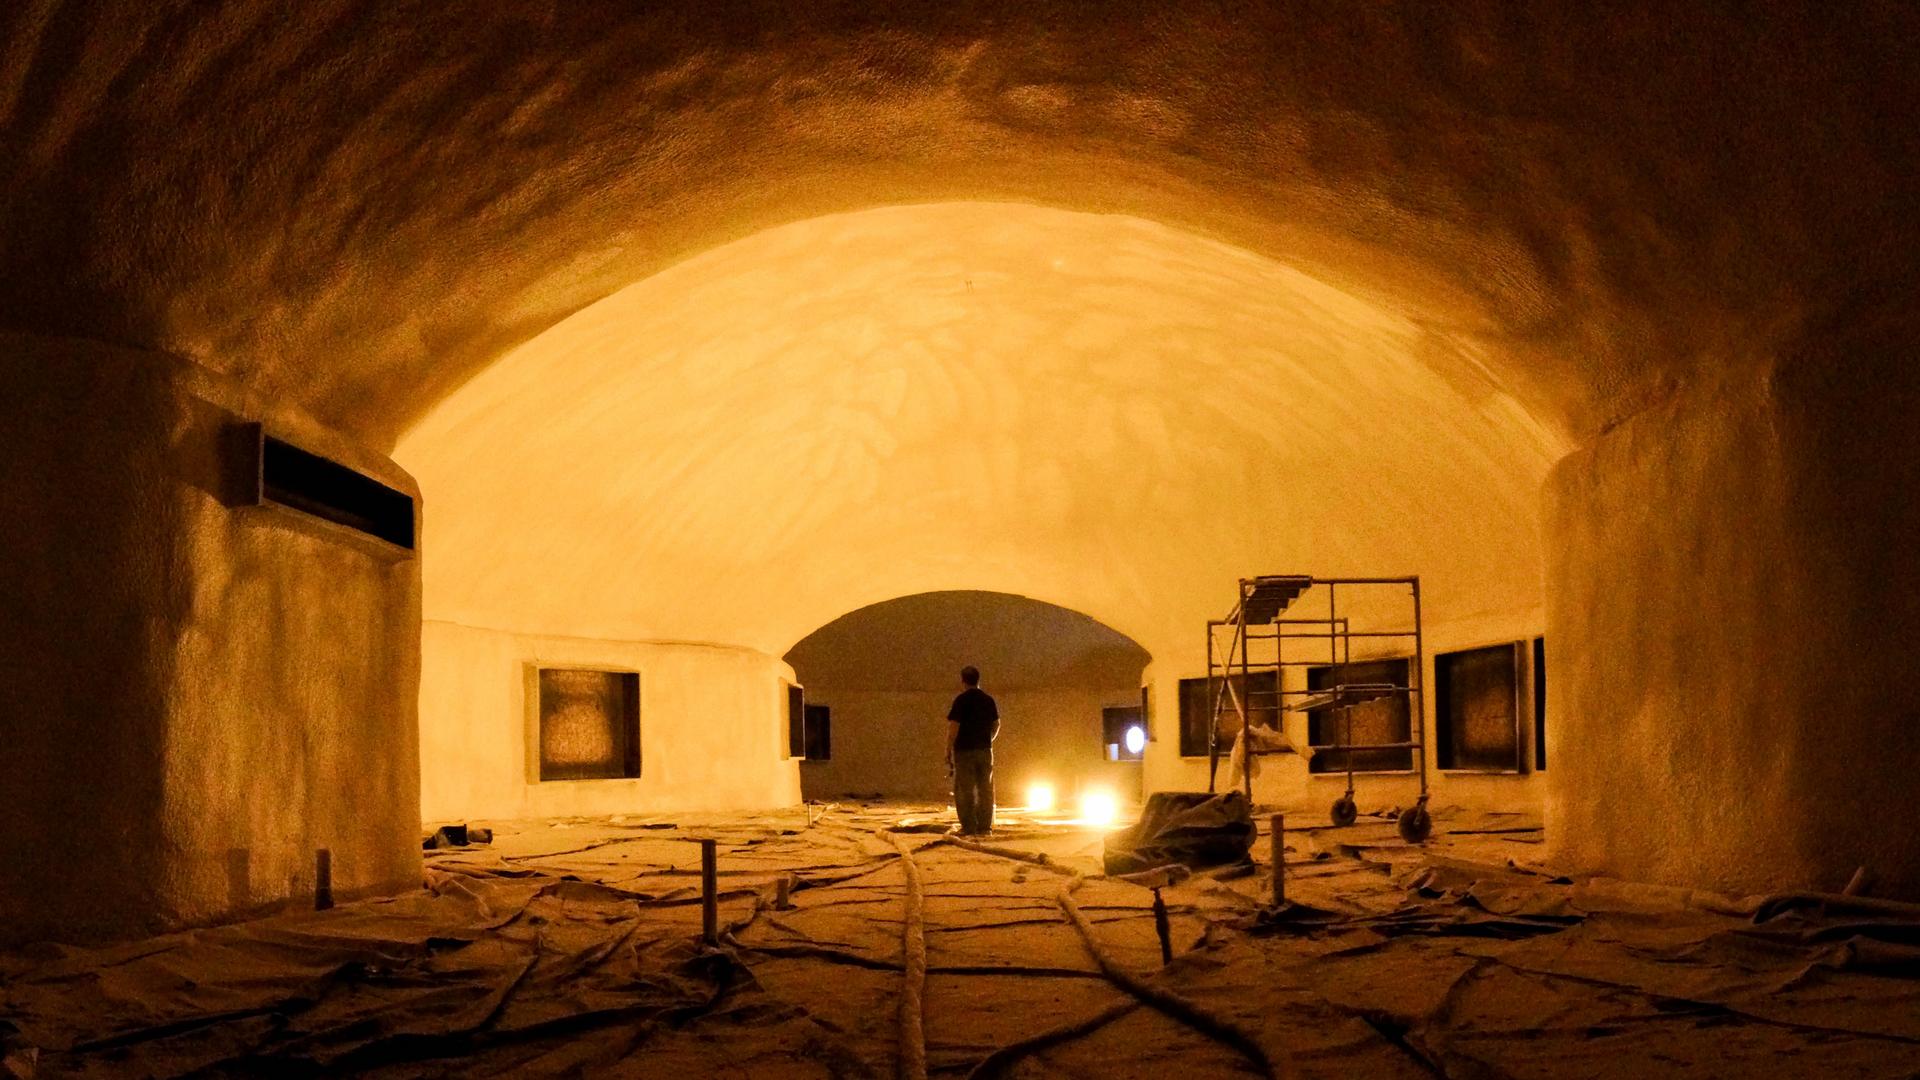
Amy’s picture of me admiring the finished polyurethane foam application. The crew did an amazing job.
The Loan
Picture in your mind your dream home—the rooms, the location, the fit and finish. Now picture a price you think you will pay for that house.
That price is wrong.
Our GC says everyone underestimates the price by huge margins. It’s the biggest hurdle he has to overcome before they can continue. Moreover, construction prices are increasing daily. A design in Logan, Utah for $200,000 five years ago is $280,000 today.
The dome just adds a new wrinkle to this already difficult process. Be aware you are plowing new ground and be prepared to pay for it.
That’s not what people want to hear. “Aren’t domes super efficient to construct?”
Yes, they are. But it’s a super-insulated, steel-reinforced concrete thin shell structure. Not some pile of toothpicks. Match this superior exterior with interiors that are essentially the same as any regular house and its price is not cheap.
So I’m going to say it, if you plan to build a Monolithic Dome home—turnkey—it will cost more.
Is it more than other unusual, custom homes we’ve seen built in this area? I doubt it.
But definitely more than that spec home pricing advertised on the billboards.
With a realistic package of pricing from the GC in hand, the banker—with some prodding from my wife who convinced him she wants the dome as much as I do—approved a construction loan with final financing tentatively in place with Freddie Mac.
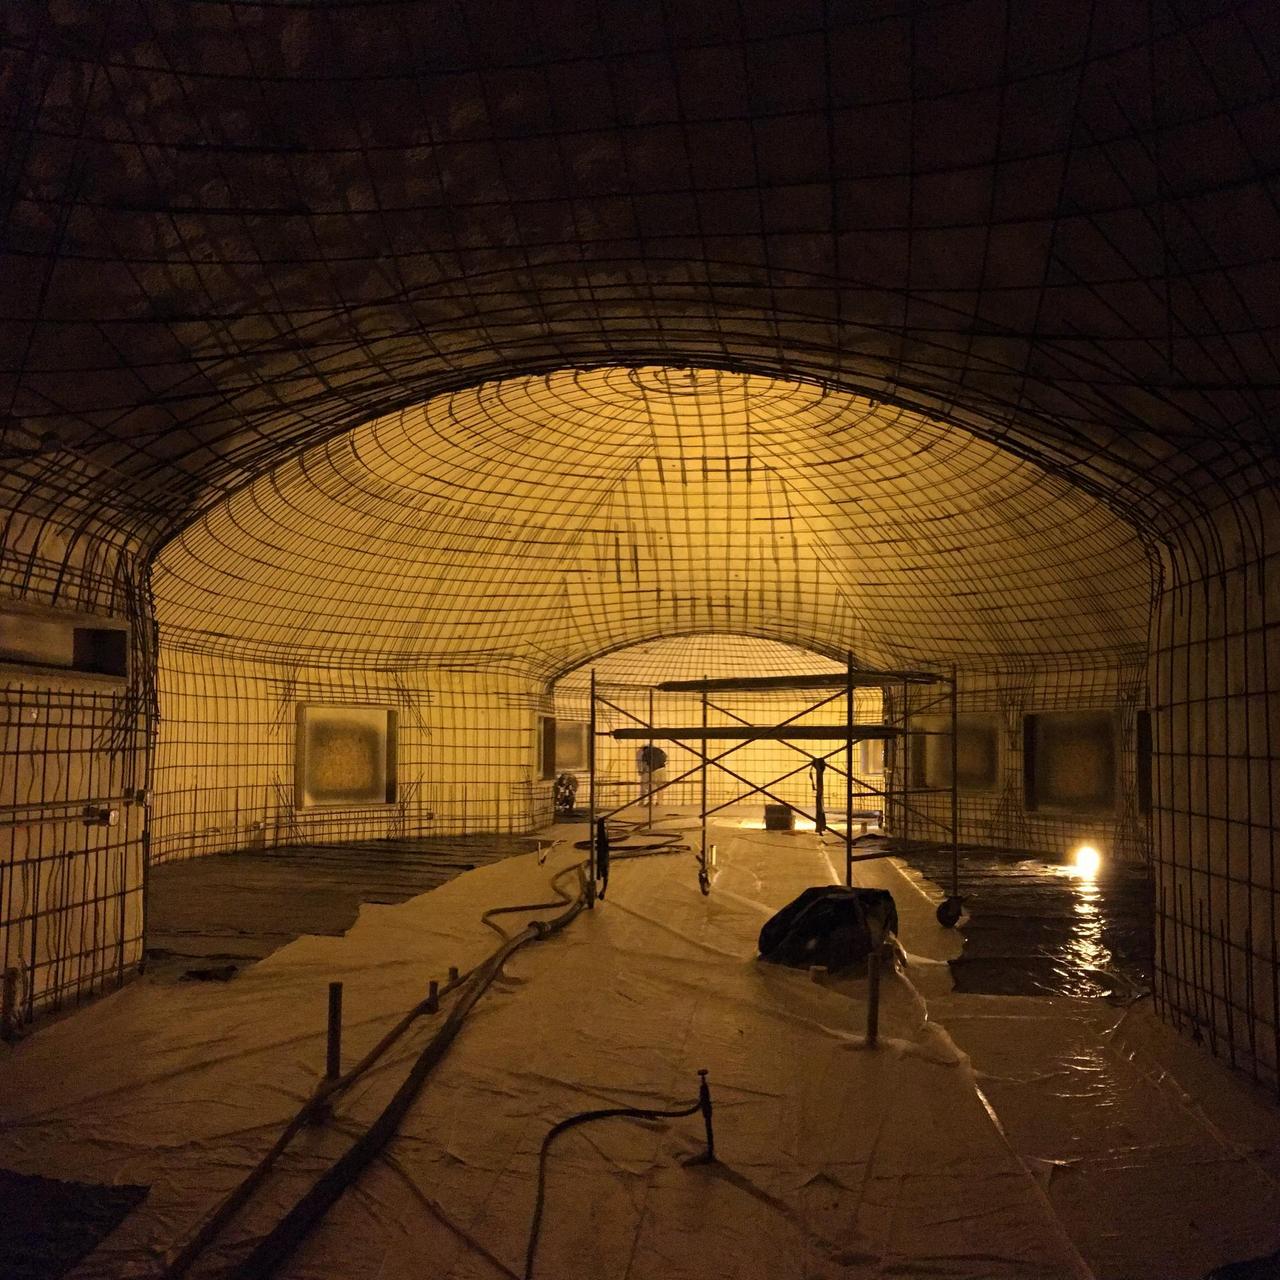
The steel rebar placement is over halfway complete. More reinforcement is needed at the top of the wall and in-between the saddles.
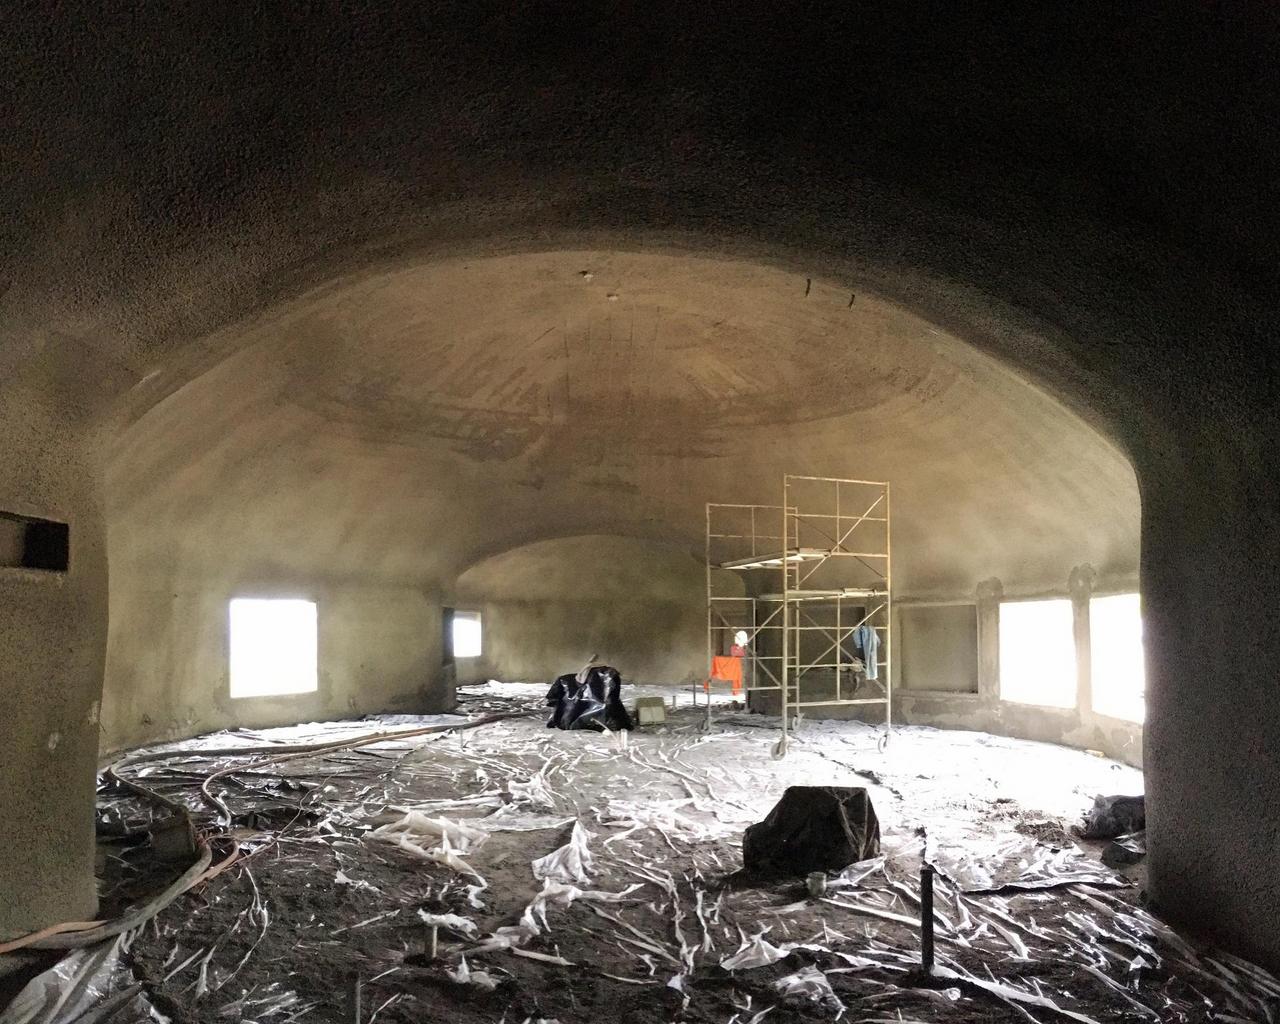
The exterior plywood forms were removed when only a few layers of shotcrete remain to be applied. The building department required shotcrete samples for compression testing. The technician reported to our loan officer that the shotcrete for Arcadia is the strongest concrete he’d ever tested.
Construction
Contractors are unfamiliar with dome construction. It’s important to work with them every step of the way. Look over plans and details with an eye for problems that crop up in the differences between dome construction and traditional construction.
For example, the contractor wanted to know how we would mount the bathroom fan “in the dome.” We don’t. We mount it on the regular wall he builds later. Information like that saves lots of trouble for the contractor and the dome builder.
Work with your dome contractor early in development. Obviously Monolithic was building our dome. We carefully reviewed construction documents and worked to fix misconceptions during construction.
Foundation and floor
Subcontractors prepared the site, dug the foundation trench, added the base foundation, and poured the foundation walls. Plumbing and electrical were stubbed through the foundation. Foam boards were placed over the ground with radiant heat water lines carefully laid out in loops. Wire mesh was put on top and the concrete floor poured. When the house is complete, hot water is pumped through these water lines, heating the home.
There are several items needed by dome builders on site—such as temporary power and water—that we spent time getting in place before sending a crew from Texas to Utah.
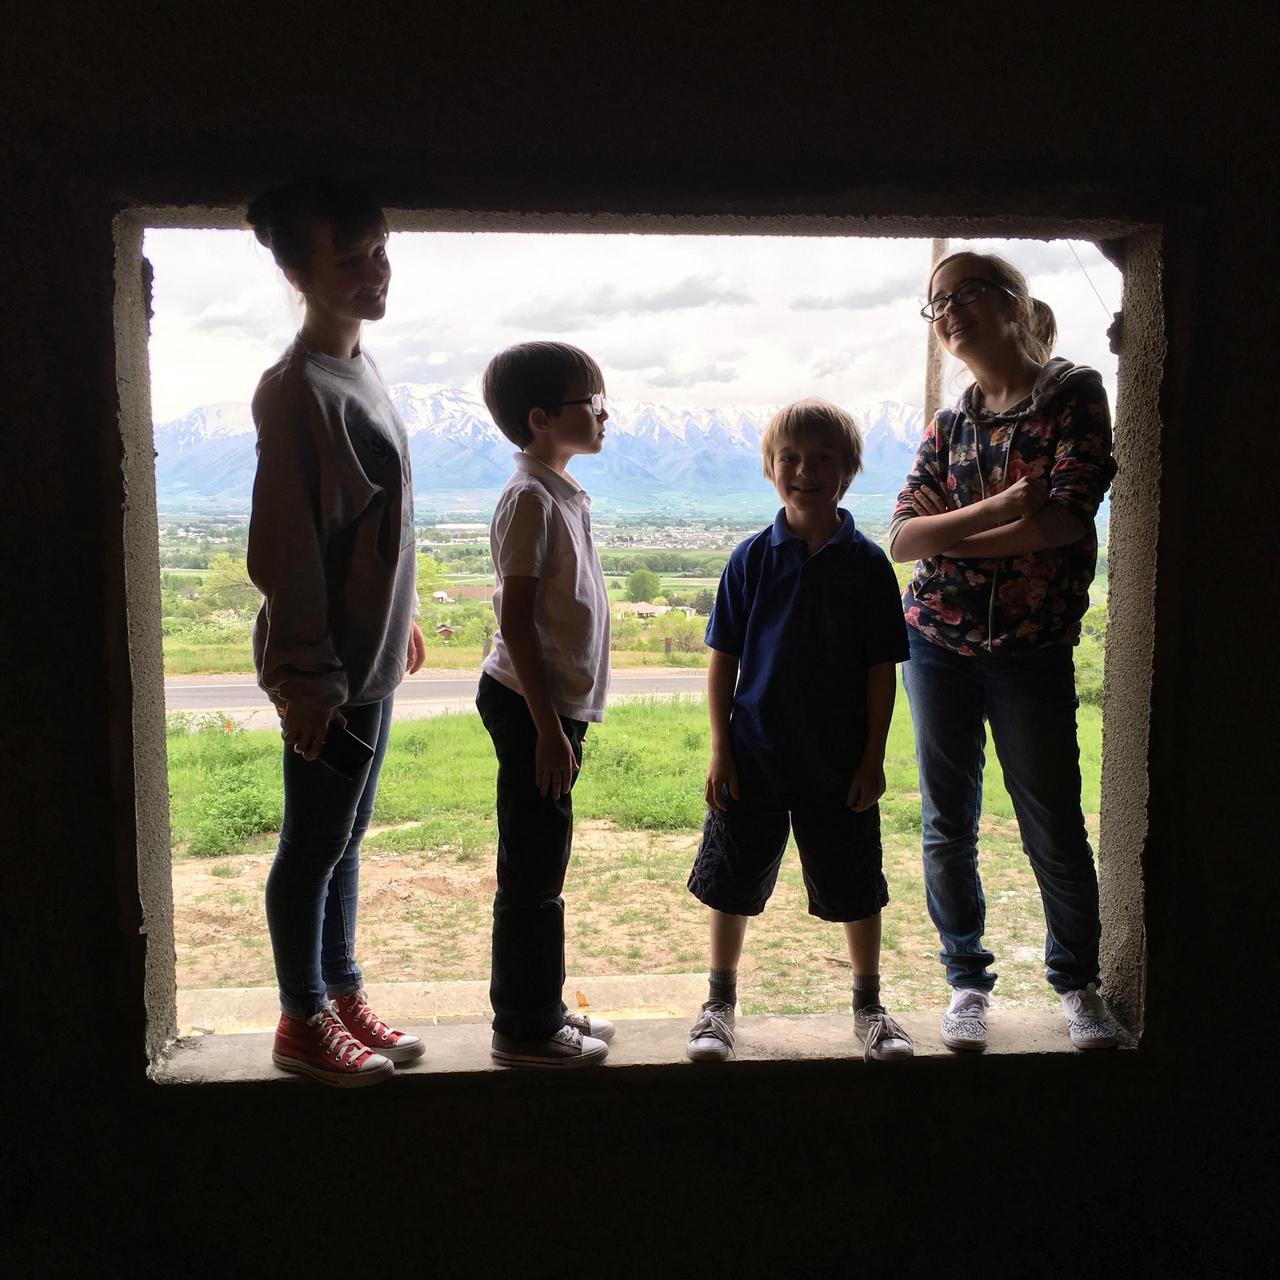
Amy, Sam, Tom, and Aubrey sizing up the large window in the sun room with its view of the valley and mountains in the west.
Dome construction
It took five weeks to build the shell. First, they created plywood forms that stood on the foundation to create the outer stem wall. A twelve-inch eave was formed at the top. Rebar was attached to the interior of the forms and shotcrete was applied, embedding the rebar. This outer wall was just the exterior “paint” of the house.
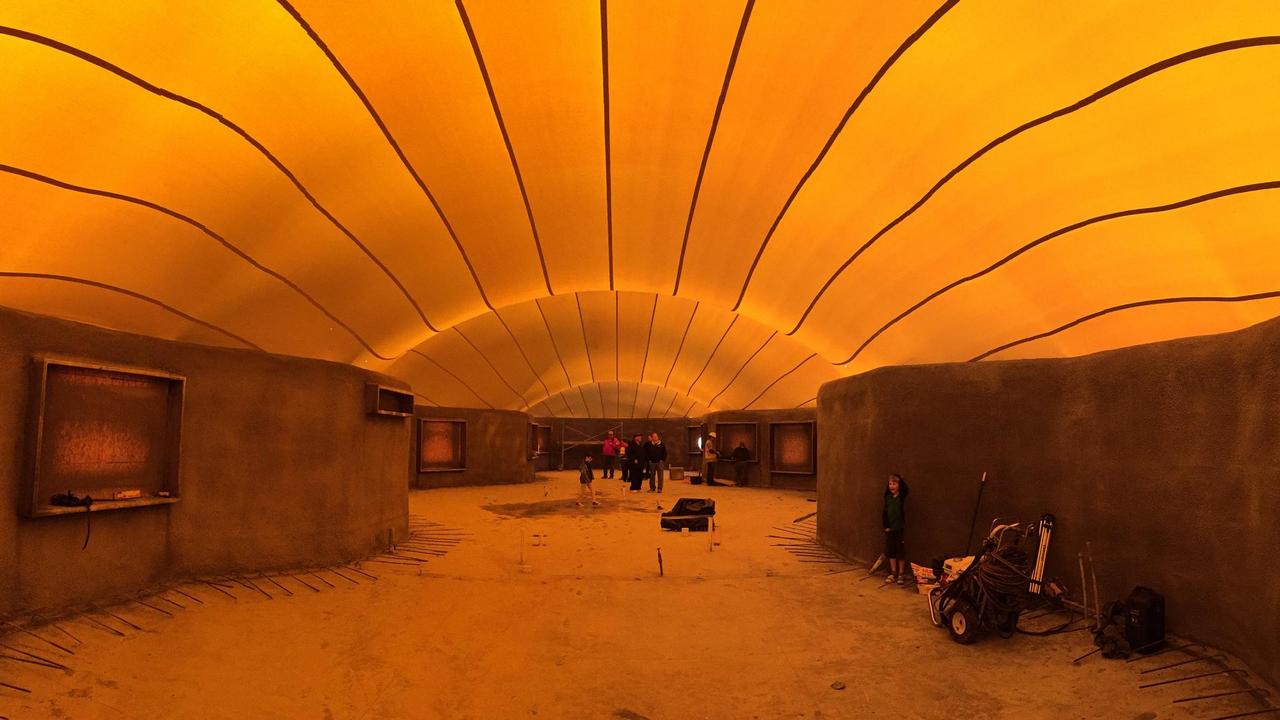
The Airform was attached to the eave and inflated. This Airform design is unlike all others. We ran the fabric horizontally, the entire length of the building. It was a prototype so it needed adjusting, but the finished shape is fantastic.
The horizontal pattern allowed us to build a dome home with an eyeball-shaped center section. When viewed from above, the middle dome is not circular.
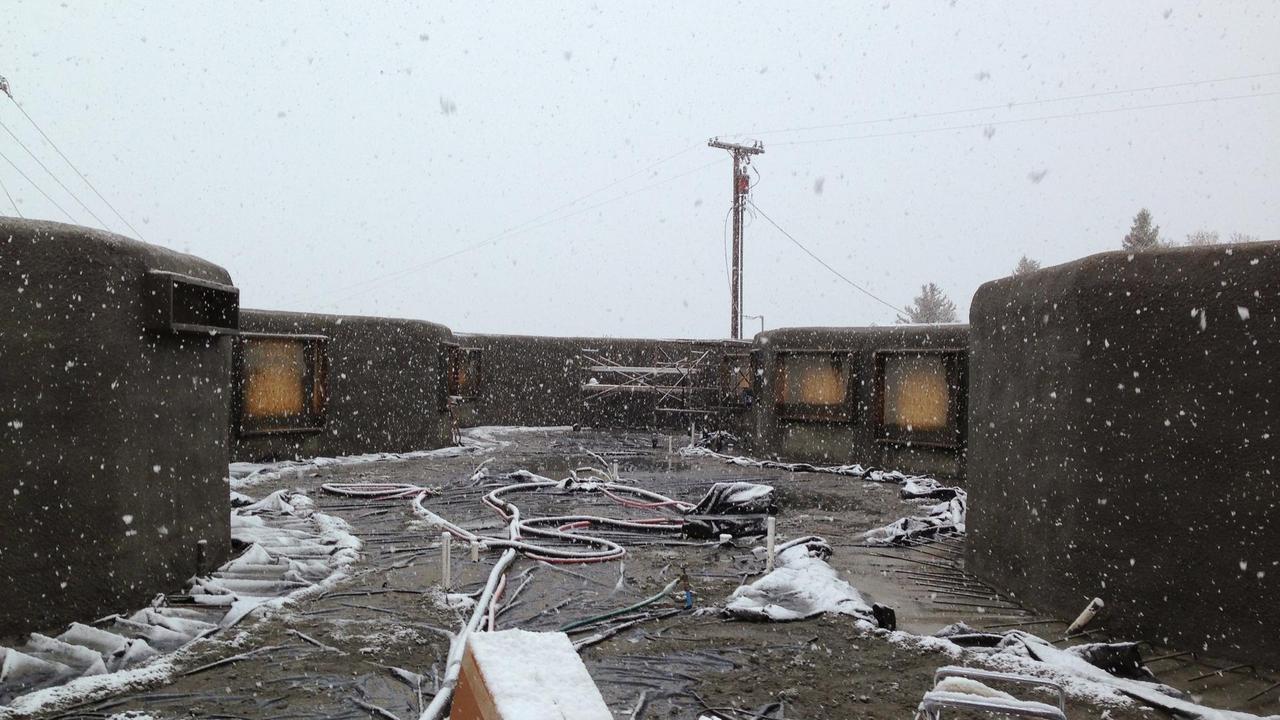
Polyurethane foam was applied to the interior concrete wall and Airform membrane. Steel rebar is attached to the foam interior. And four inches of shotcrete embedding the rebar, completing the structure.
Several coats of paint to prime the dome and the crew was finished.
Soon, local subcontractors will start framing walls, running electrical wires, adding plumbing. Hopefully, by the end of summer, we will be living in a dome home again.
Lessons learned
The number one thing to learn in construction is patience. Custom construction is especially prone to delays. Make plans, try to stick to them, but remember that things happen. Subcontractors are not ready when you are. The house will take longer than you want it to.
When borrowing money, the one who has the gold makes the rules. You need to prove to them you are worth the risk. Time and patience are required.
Communicate with your contractor and the dome contractor. Write everything down. If you want a change, communicate it via email or writing. Don’t assume they will remember what you said on site.
Shop around for flooring, appliances, finishes. Your contractor is good at their job but don’t make them do all the work. Do your homework. Find out what everything costs. Make it your business to know the details.
Be kind. Through all of this, there will be difficult questions. Challenges with building inspectors, subcontractors, and even each other. Remember, you will be living in this home for decades. Keep that goal in mind when troubles begin.
Finally, it’s worth it. I can say that without reservation. A Monolithic Dome home is a fabulous place to live. They are beautiful and function beyond expectations.
Dave South is co-owner of Monolithic, publisher of the Monolithic Dome Institute, and a son of David B. South—co-inventor of the Monolithic Dome. He and his family reside impatiently in a small rental in Providence, Utah until their Monolithic Dome house is finished.

