Monolithic Dome Exterior Restoration in Florida Horse Country
Way back in 2001, my wife and I were living in a commercial building that we had rezoned and rehabilitated into a loft apartment. What had attracted us to a commercial building were the wide-open spaces, high ceilings, and overall uniqueness and non-cookie-cutter look to the building. During this time, we had also started to research other types of buildings that offered the same kind of features, and we came across Monolithic Domes. We ordered the Monolithic Dome binder from Texas and flipped through it, daydreaming about having our own dome someday.
Fast forward to 2017, and my wife came across a Monolithic Dome for sale in Northern Florida. It was on the market at a very good price because of prolonged water-damage when the stucco system covering the Airform had failed. Due to the design of the openings, the cracking of the stucco had allowed water to compromise all of the exterior stud wall structures at each door. With my background in engineering and our joint experience in renovating spaces, we felt we were up to the challenge of restoring the dome. Our daydreaming about Monolithic Domes all of those years ago perhaps had spurred this opportunity into being, and this was our opportunity to take advantage of it.
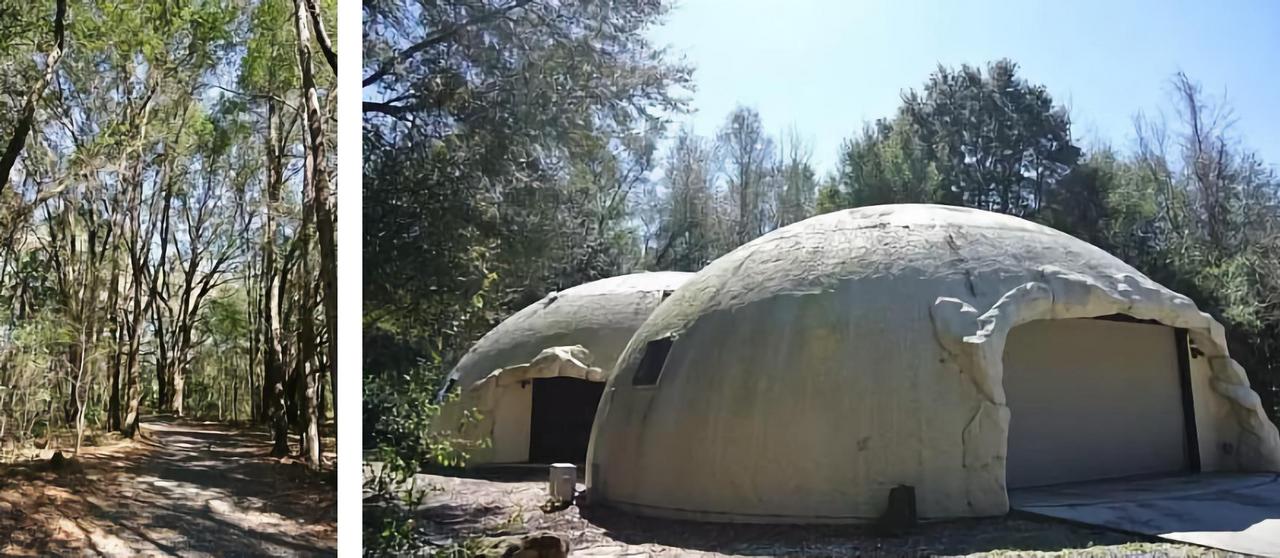
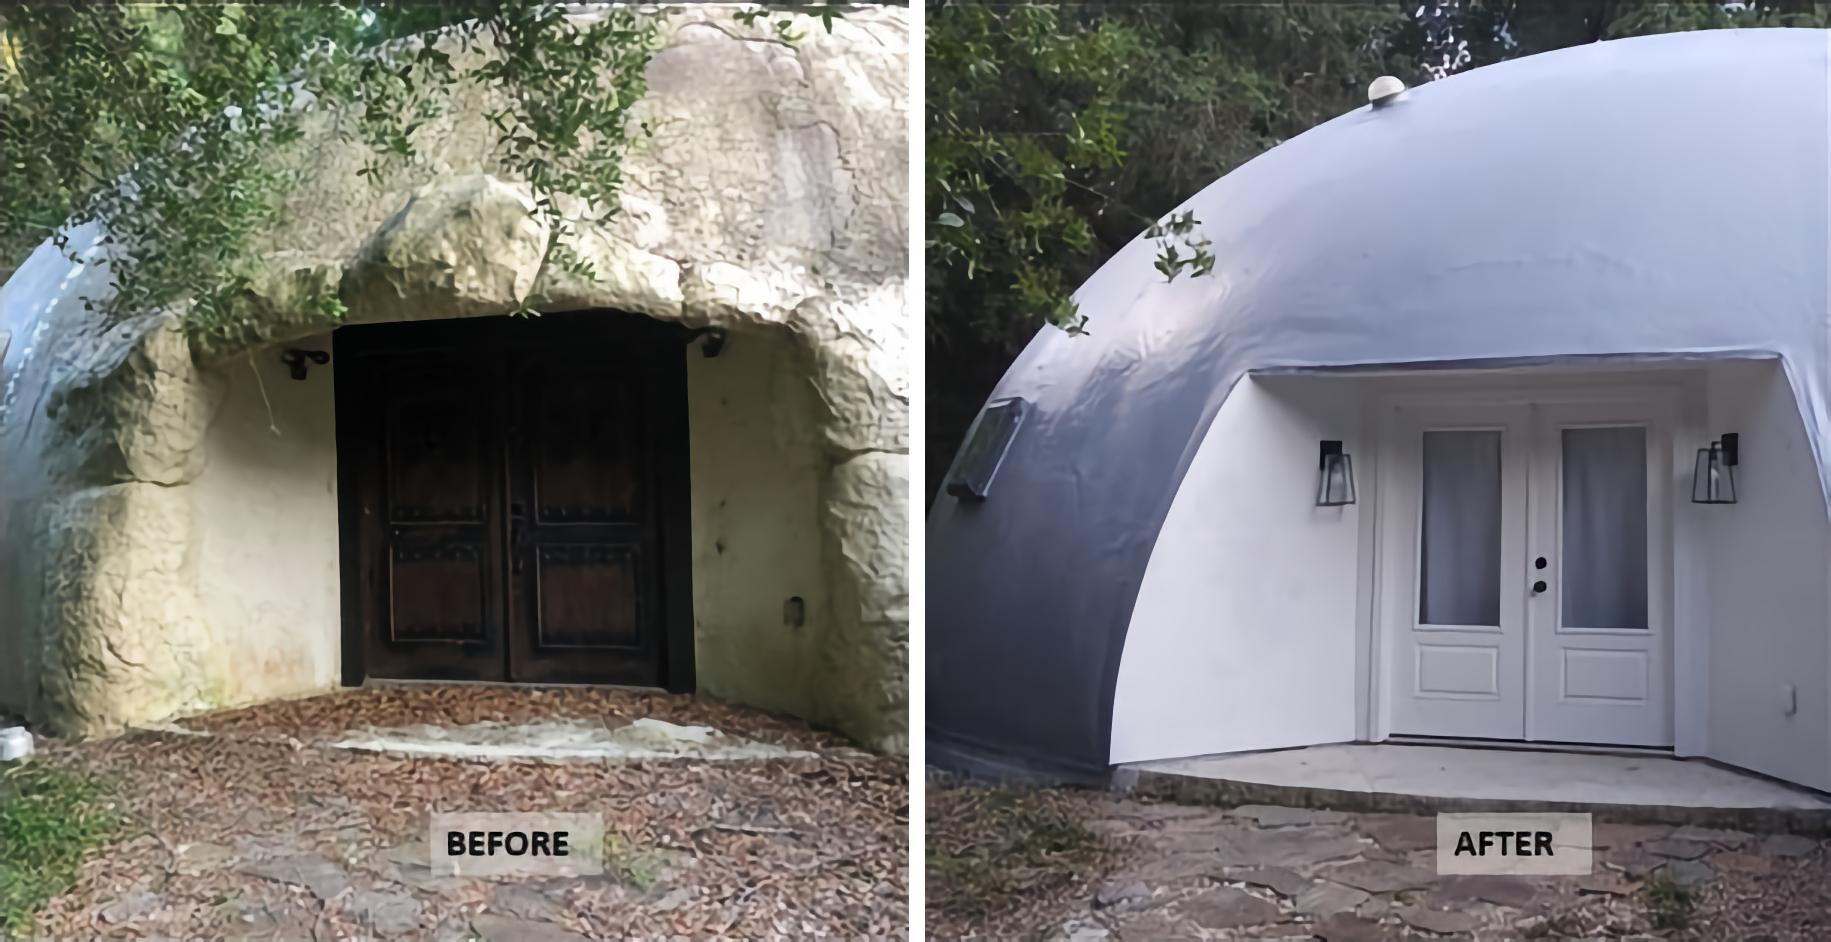
A beautiful, tree-lined driveway (left) led to the twin dome home (right) as it appeared in 2017. A thin layer of stucco-like hard coat material covers the entire Airform. The cave-like entrances were created by bending stucco mesh into the shape of rocks and covering them with a thick layer of stucco.
The Dome
The dome sits on a wooded 1.6 acres on a designated Florida Marion County “scenic road” full of lovely horse farms and nice houses. The lot has a 300-foot driveway that winds through the woods and arrives at a fairly private clearing. In fact, the trees were so dense that they were starting to cover the dome and shed lots of leaves and debris onto them. We had to remove a few trees for this reason and for general safety in case one fell over.
The dome is actually two connected domes: a 40-foot diameter by 15-foot tall garage dome and a 50-foot diameter by 20-foot main dome merged together with a camel seat between them. The original owners wanted a “cave-like” look, so they had the contractors bend stucco mesh into the shape of rocks around each opening before applying the stucco.
Half of the interior of the main dome is dedicated to an enormous master bedroom suite of almost 1,000 square feet, and the other half contains the kitchen/dining room and adjacent solarium/second bedroom, with a laundry room/utility closet between the two halves. The garage dome has a two-car garage, two adjacent rooms, and a bathroom—with a curved-wall shower—which could be used as a guest quarter.
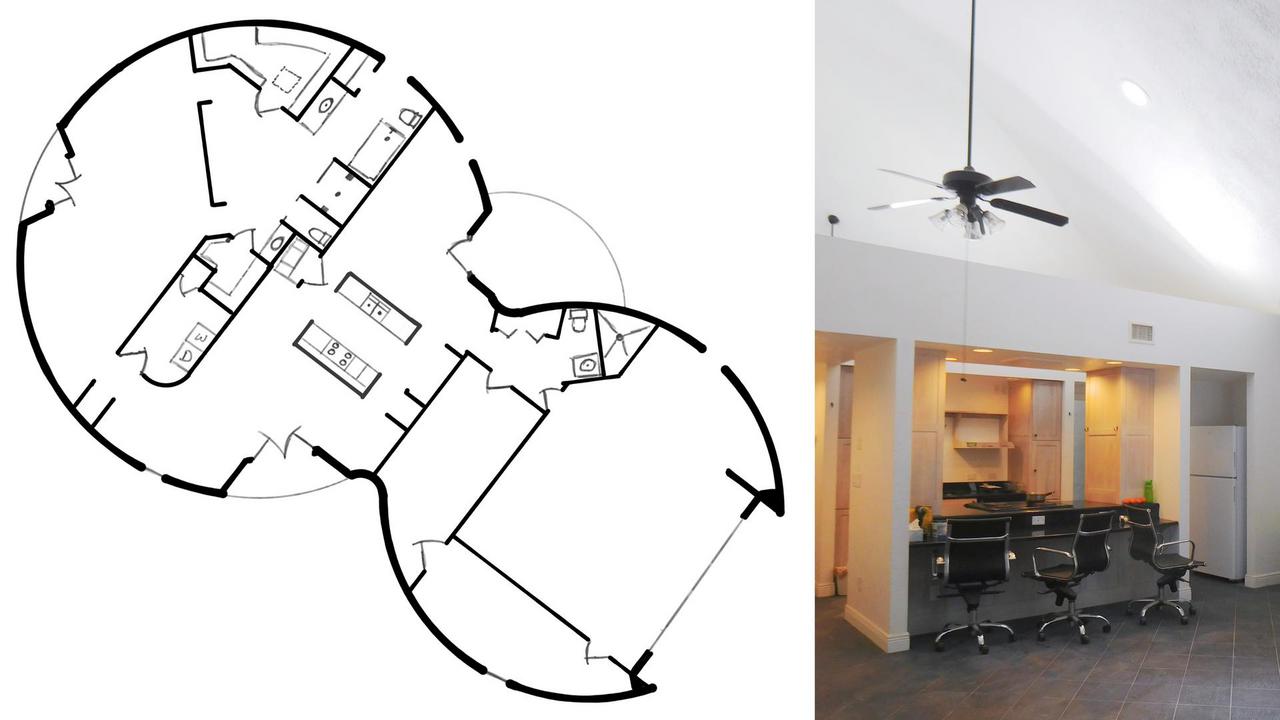
A simplified floor plan (left) of the main 50-foot diameter home with the 40-foot diameter attached garage—with guest room. The galley kitchen (right) is the center of the main dome.
Design and Planning
The four exterior doorways—bedrooms, main entrance, and garage—are each inset from the shell of the dome. Rather than build the vertical inset walls first and then create aesthetic fake rocks around them, the fake rocks were seamlessly part of the integrity of the wall. According to Building Science, there are two types of stucco—one that is leaking and one that will leak in the future. So when cracks in the thin stucco formed, water was channeled into the house. In one doorway, I hammered several holes in the stucco rocks and walls in key places to allow rainwater to exit to the outside and not continue to flood the house.
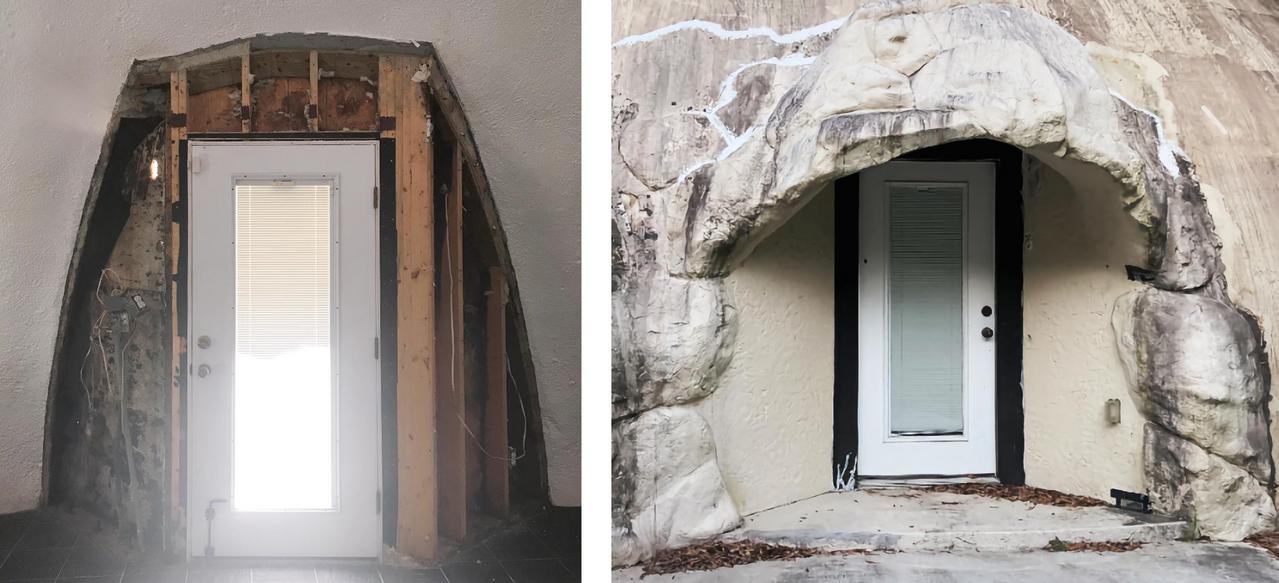
An example of the doorway damage that we saw while looking at the dome for the first time in 2017. One of my water-relieving holes, covered with a bug-preventing mesh, can be seen in the lower right of the right photo.
Once we bought the dome, the next step was to design a solution for the doorways and find a contractor that could implement it. The previous owner had already researched a solution for the coating and had found ProGuard Liquid EPDM, a coating that he mentioned was used on a lot of the industrial domes. He had started to remove some of the stucco at the top of the domes but left most of the job undone when life got too hectic for him.
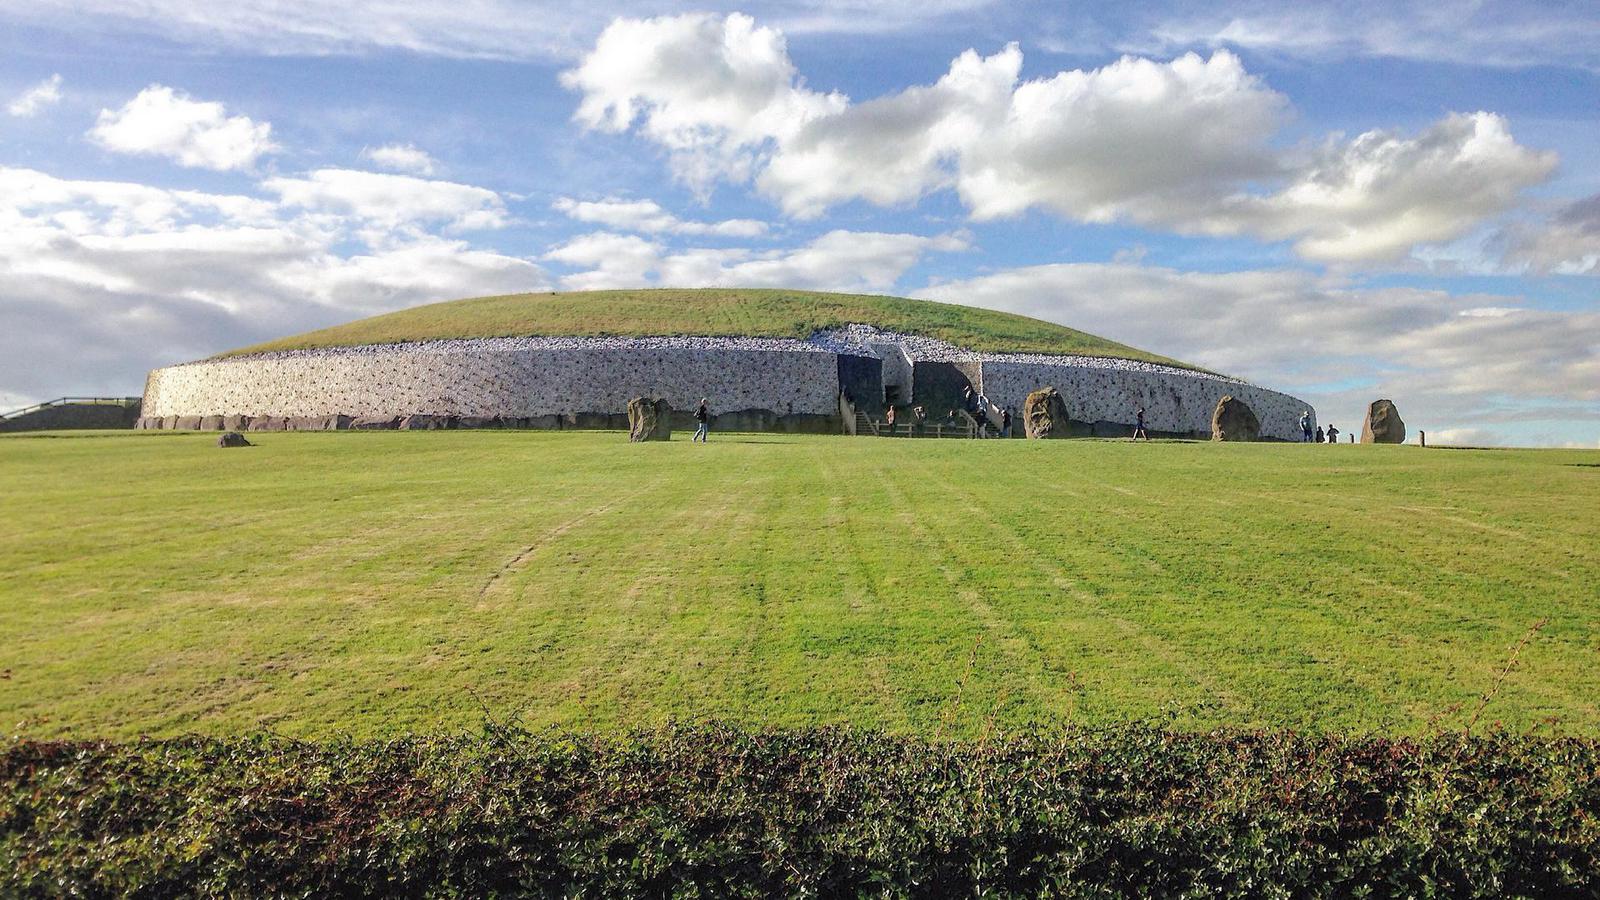
We decided to go along with the plan of the original owner for recoating the dome—remove the stucco, along with the fake cave rocks, and have a clean look to the exterior of the dome with the liquid rubber. The rocks are cool but we decided that they would be too much trouble to try and recreate and maintain properly. We discussed and researched various solutions for replacing the doorways—concrete walls, metal studs, even commercial-style aluminum framing with all glass walls (too expensive), or pressure-treated studs with a re-engineered exterior. We researched different types of sheathing, including cementitious types and DensGlass. We debated using tile and other materials as exterior cladding. We even considered designing interesting spiral patterns on the walls, inspired by our trip to Ireland, where we visited Newgrange. We made lots of sketches. We interviewed many different contractors.
For many months running, the contractors that we met with told us that they weren’t interested in the job, if they got back to us at all. It occurred to me that despite my sketches, with the fake rocks in the way it was impossible for the contractors to see what was really going on with the walls, how much Airform still existed at the edges, and how the final solution would all come together. We decided to stop interviewing contractors until we could remove the remaining 5,000 square feet of stucco ourselves, including the fake rocks, and install house-wrap as a temporary covering where the fake rocks used to be.
Stucco Demolition
Somewhat luckily for us, the stucco wasn’t applied in a manner that is recommended by Monolithic. Monolithic recommends a 1.5 to 2-inch thick chain shell stucco with a metal mesh that looks like a chain-link fence. The stucco on our dome was sometimes as thin as a half-inch and at various intervals, there were plastic anti-crack-propagation strips stapled into the Airform. There was no metal mesh at all on the dome structure itself, except when used to form the fake rocks around the openings as already mentioned, and those were stapled to the Airform with lots of staples. The fake rocks used hard coats up to a foot thick, which made getting rid of them a unique challenge. In addition, some doorways had steel rods that helped hold up the fake-rock awning, and these had to be removed as well. We worked side by side, each armed with 14-ounce hammers to remove the thin stucco, and I used an 8-pound sledgehammer to remove the fake rocks. Hundreds of staples had to be removed one by one around the entire dome with pliers and then each and every hole filled with silicone caulking.
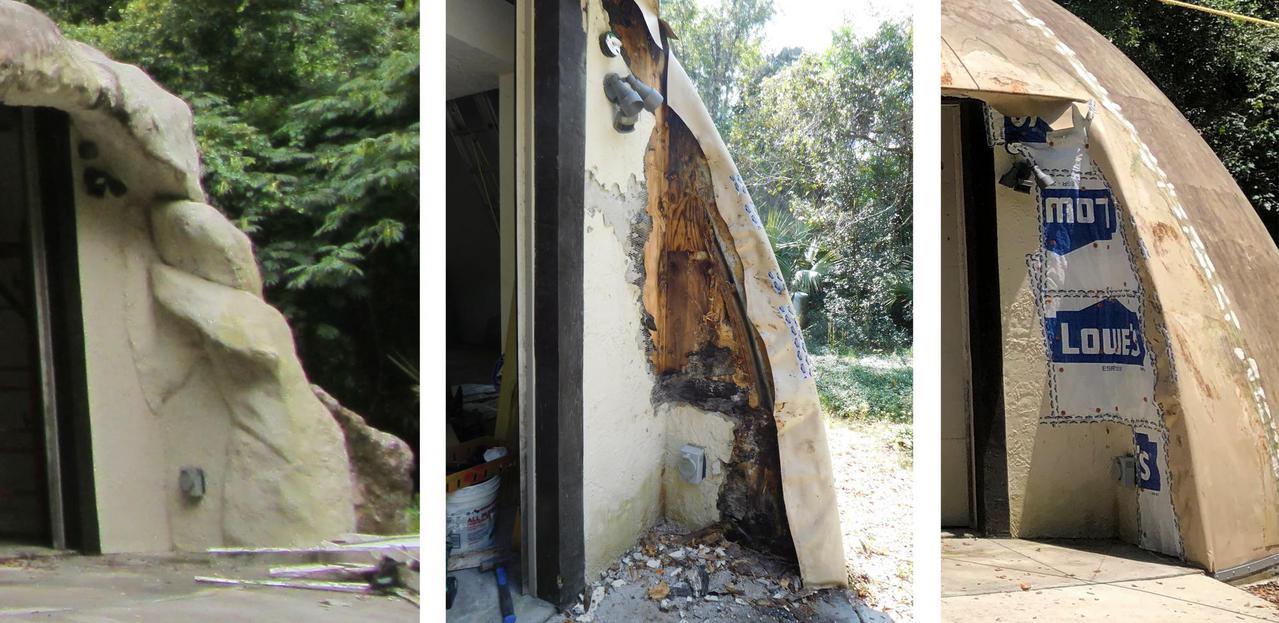
The garage door entrance before fake rock removal (left), after fake rock removal (middle), and after house wrap applied (right). It is much easier to picture how to rebuild the walls if you look at the picture on the right rather than the one on the far left.
After removing the fake rocks, we were happy to discover that every entryway except one edge contained a flap of Airform at least one foot wide. We were able to order a scrap piece of Airform to glue onto the one entryway edge that didn’t have one, using the recommended NP1 adhesive.
Getting to the top of the dome
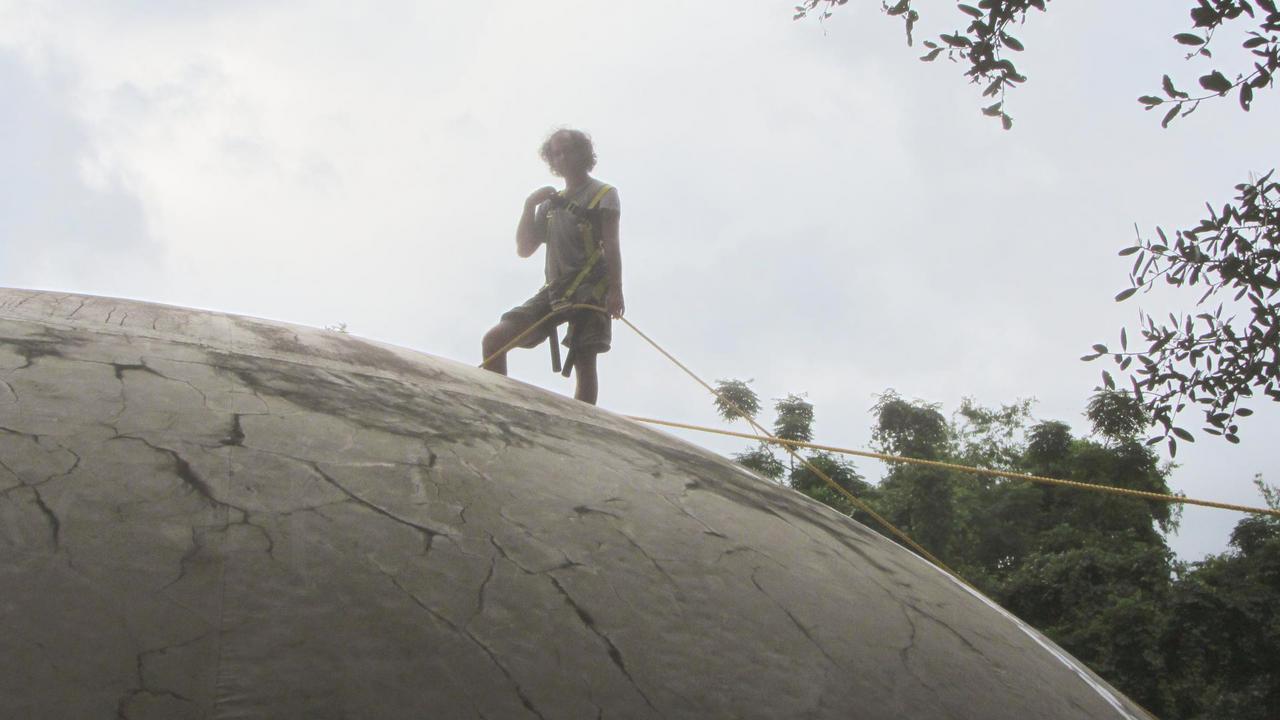
To remove the stucco from the top of the dome in areas that I could not reach by ladder, I followed the advice of Monolithic and used crisscross ropes and a harness. My initial dilemma was how to connect the ropes together where they cross each other before dragging that connection point to the top of the dome. I didn’t want to try and create the connection while standing at the top of the dome, because if the rope that my harness was connected to were to slip, I would be on the ground very quickly. I researched solutions for connecting ropes together and was happy to find rope anchors.
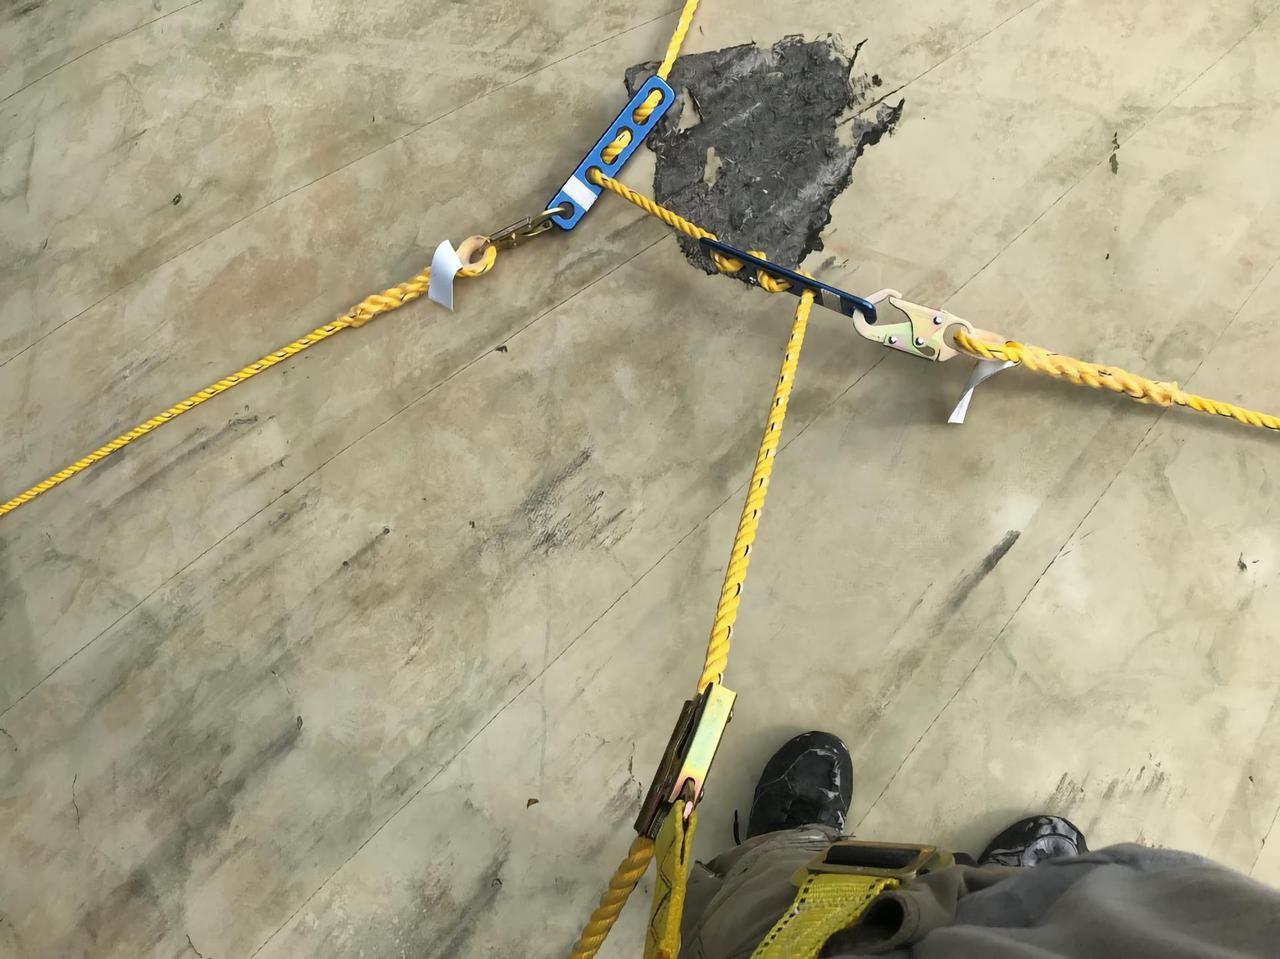
Rope anchors (metallic blue) were used to make the connection points. Several configurations were attempted. This photo shows the first attempt.
To aid in reaching the top of the dome, I bought a 26-foot ladder with flared ends and attached a ladder stabilizer which really helped to accommodate the curve of the dome. Due to the curve of the dome, the highest I could extend the ladder was 14 feet or so, but this also meant that my ladder steps were double in width, making going up and down very comfortable on the feet.
My procedure for getting to the top of the dome:
- Connect the three ropes together with the rope anchors, leaving a dangling length of rope for the harness connection. I have 50, 75, and 150-foot fall-protection ropes.
- Drag the crossing point of the ropes as close as I could to the top of the dome.
- Tie the four rope ends—both ends of the 150-foot rope and one end each of the 50 and 75-foot rope—to four different trees.
- Place the ladder next to the dangling rope.
- Put on the harness and connect it to the dangling rope.
- Climb the ladder to the top.
- Step off the ladder and climb the rest of the way to the middle of the dome.
Restoration
My hunch was correct, and once we removed all of the stucco and fake rocks, we found a contractor that agreed to work on the dome in fairly short order, called, ironically, Straight Line Construction. The owner of the company told me that if I hadn’t mentioned that I was trained in engineering, he wouldn’t have taken the job. That was a lesson learned—don’t be shy to explain to people that you know what you are doing or at least project the confidence that you do!
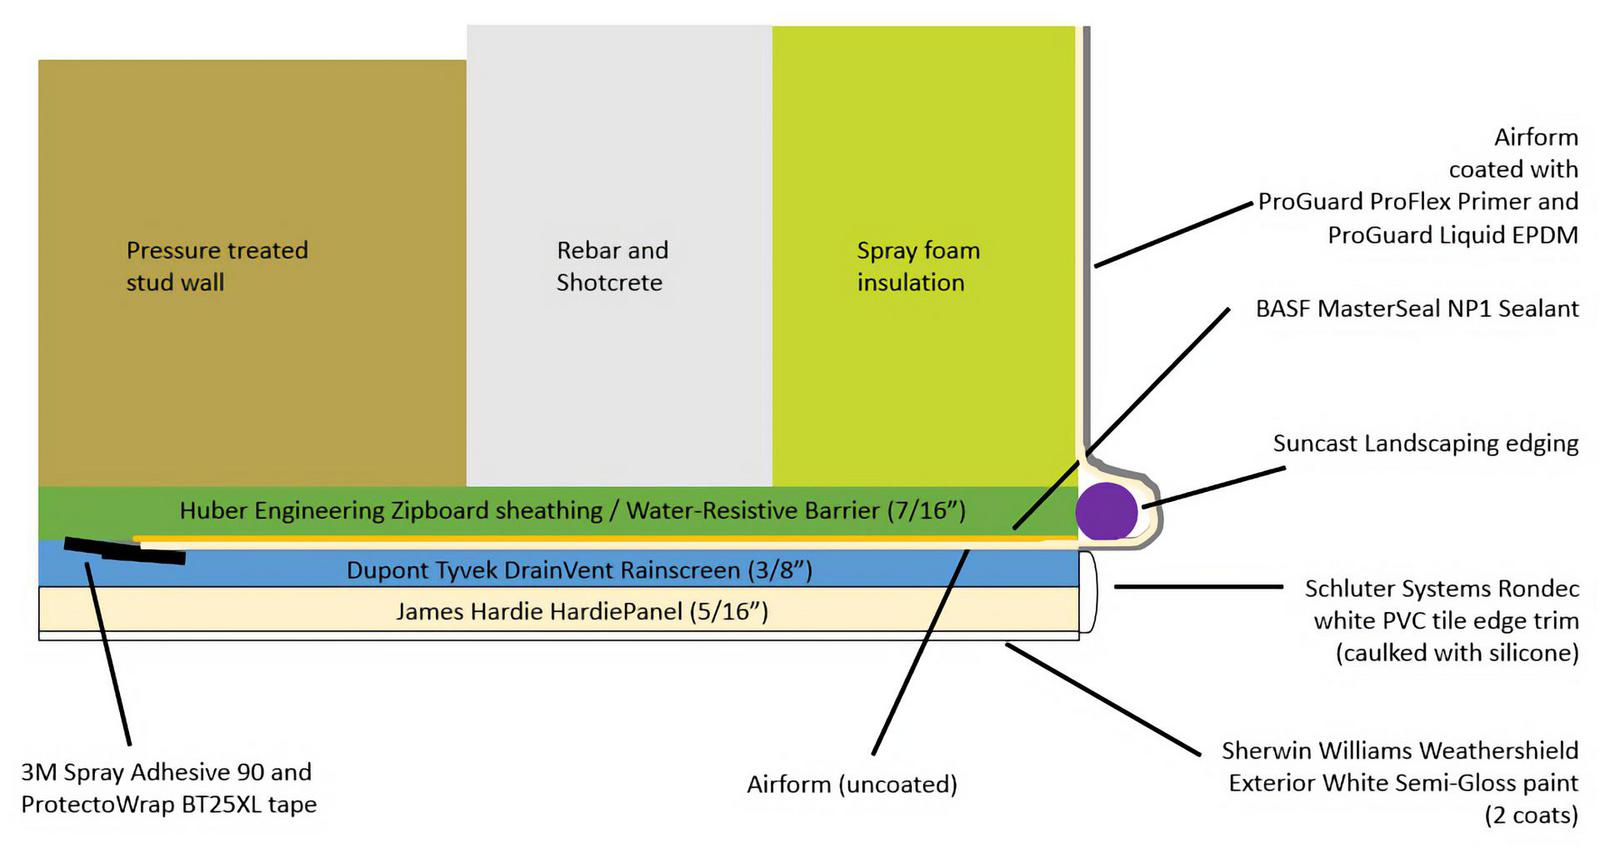
For reasons of cost, zoning regulations, and practicality, we decided to rebuild the walls with pressure-treated studs. We used Rockwool insulation in the stud bays, bathroom-rated drywall on the interior side, and Huber Engineering’s Zip System for the exterior sheathing with integrated house wrap. After the sheathing, I specified that metal flashing is glued down to the concrete patio areas to channel water away from the walls, based on a YouTube video I saw from Matt Risinger. A 3/8 inch rain-screen was installed between the sheathing and cladding based on advice that I had read from Building Science. We picked Hardie Panel for the cladding. My contractors came up with an idea to use tile edging at the interfaces between dome and Hardie.
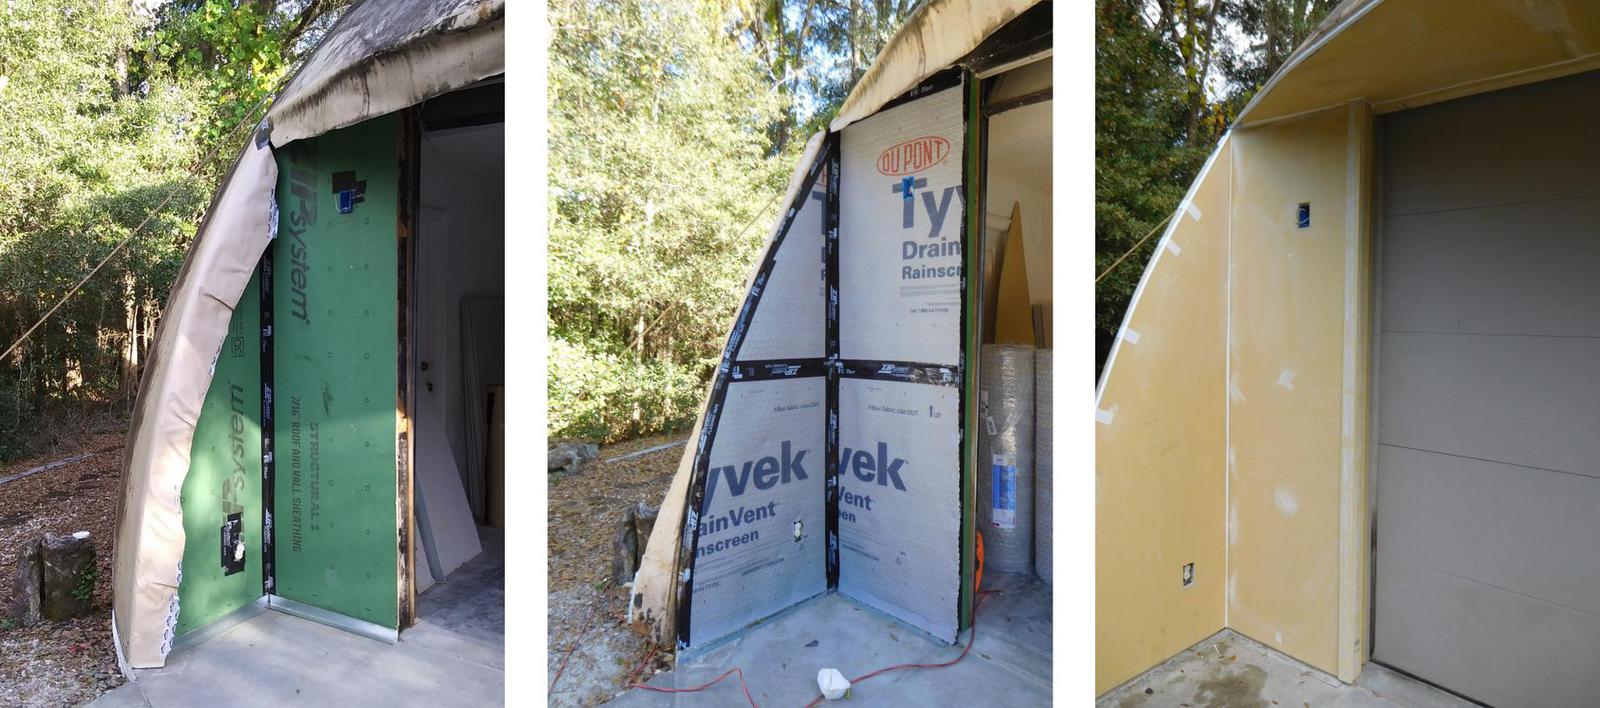
Zip System sheathing and metal flashing applied (left), the 3/8-inch rain-screen applied (middle), and the Hardie Panel plus Schluter tile edging—temporarily taped down—and paintable silicone caulk applied (right)
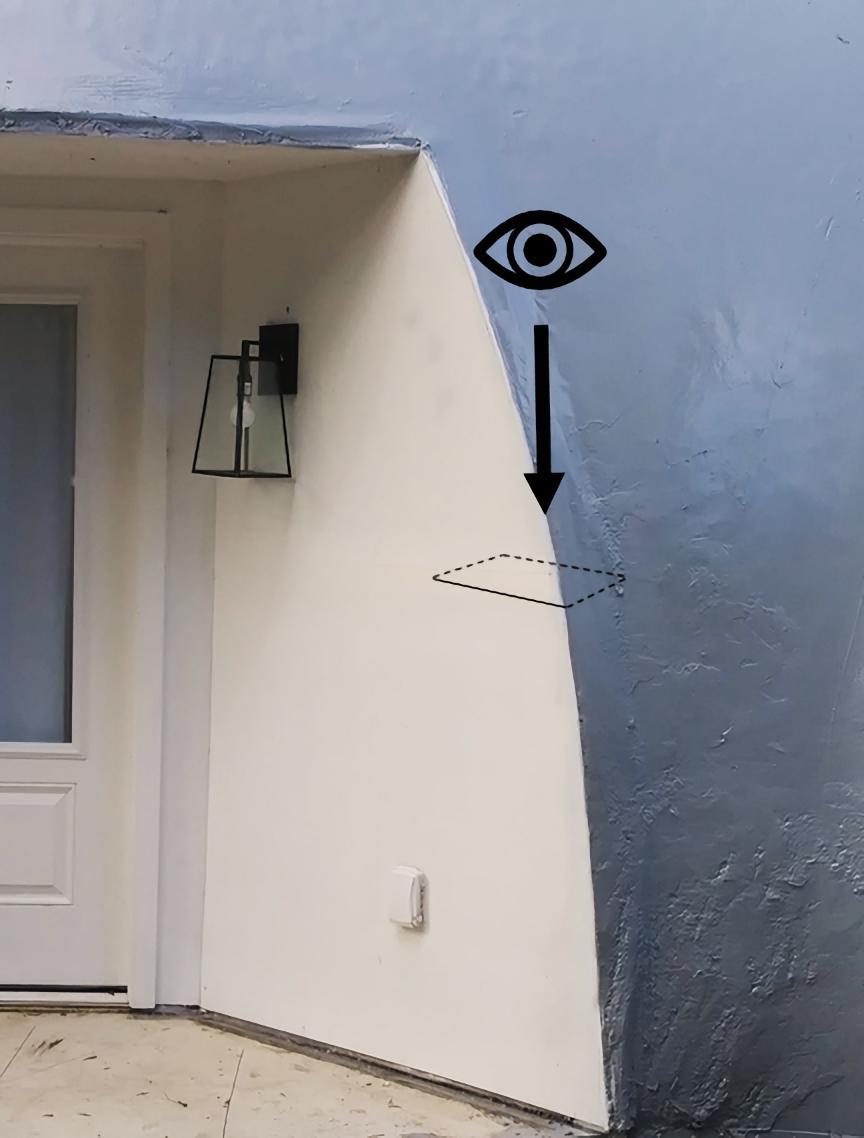
One of the key questions I had for Monolithic was how to deal with the interface between the cladding and the Airform with an inset wall. Gary Clark from Monolithic recommend NP1 adhesive for gluing the Airform down to the sheathing and ProtectoWrap tape for flashing that seam and all other seams such as around the windows. He also explained to me that if you place some sort of one to two-inch diameter object underneath the Airform at the edge of the wall—“think pool noodle”, he said—then it would create a “lip” which would help channel water away from the walls. When I told this “lip” recommendation to my contractors, they came up with the idea to use landscape edging. The landscape edging worked somewhat, but if I were to do it all over, I probably would have tried to find something with a larger diameter.
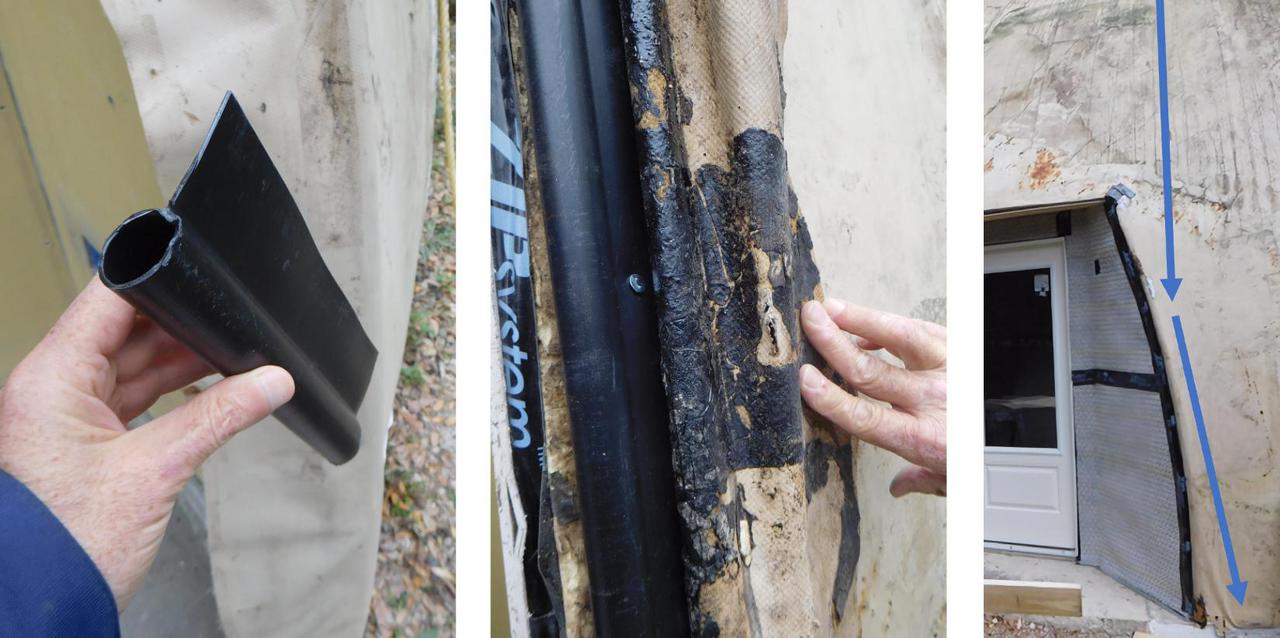
Landscape edging (left) was installed underneath the Airform (middle) at the edges of the dome openings. Arrows show how the rainwater direction (right) is helped after the lip is installed.
Liquid Rubber
Once the Hardie Panel was installed and I had painted it white, I prepared the dome for the liquid rubber. I spent days scrubbing the entirety of both domes with a plastic bristled tile brush because years of muck had built up underneath the stucco, and I didn’t want the rubber installer to waste multiple days getting it off. The organic matter also became very slippery when wet, and more than once I was saved by my harness after I slipped in it as I scrubbed and hosed it down.
Preparation also involved the foundation and the metal ring at the base of the domes. First, I used a metal scrub brush to remove all loose rust from the ring. Even though I knew I would apply rubber over the ring, I also applied two coats of industrial rust proofer Rust Bullet to the ring and caulked any gaps at the top of the ring where it meets the Airform to prevent any future rust issues. I also painted the foundation where the demolition work had left the concrete bare to prevent the absorption of water. I asked the installers to coat the metal ring but not the foundation. My thinking was that if the foundation were to absorb groundwater (from underneath), it could breathe it out through the layer of paint, but not the rubber. This was based on my research from Building Science.
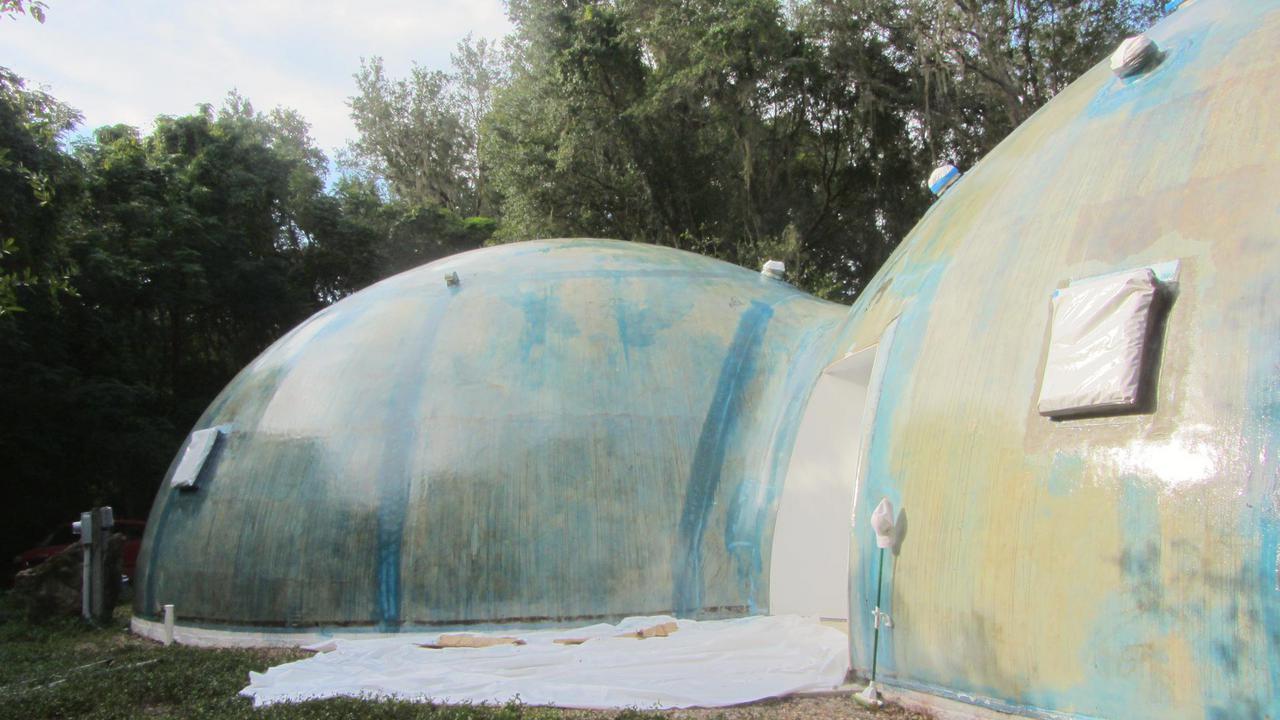
The liquid rubber installers worked as a team of three for three days—two days of preparation and priming, and another day applying two coats of the liquid rubber. When extra thickness was needed to fill a gap, cork powder was added to the primer to form a slurry which then was applied by hand.
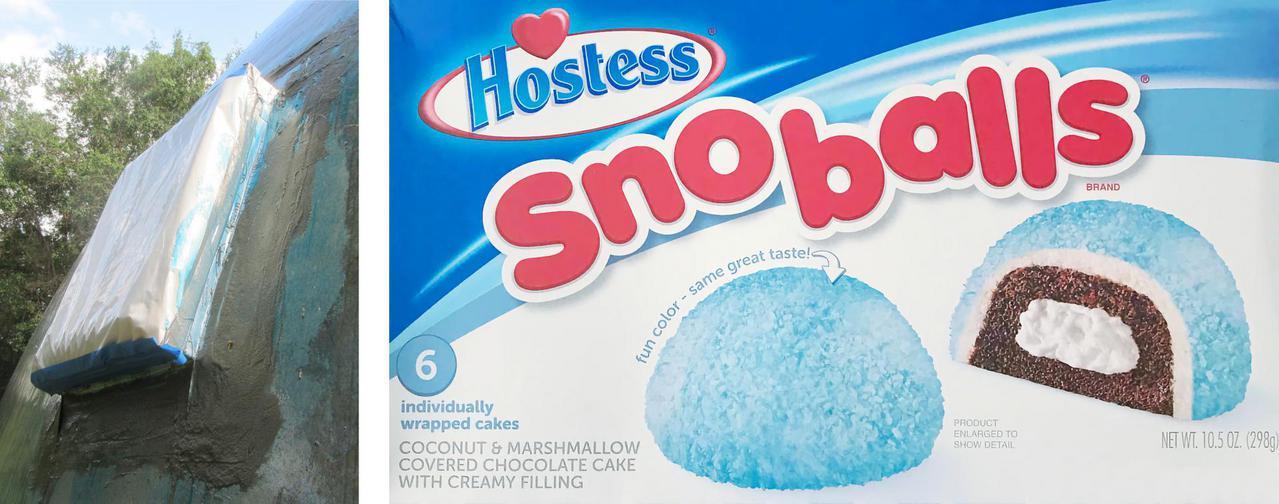
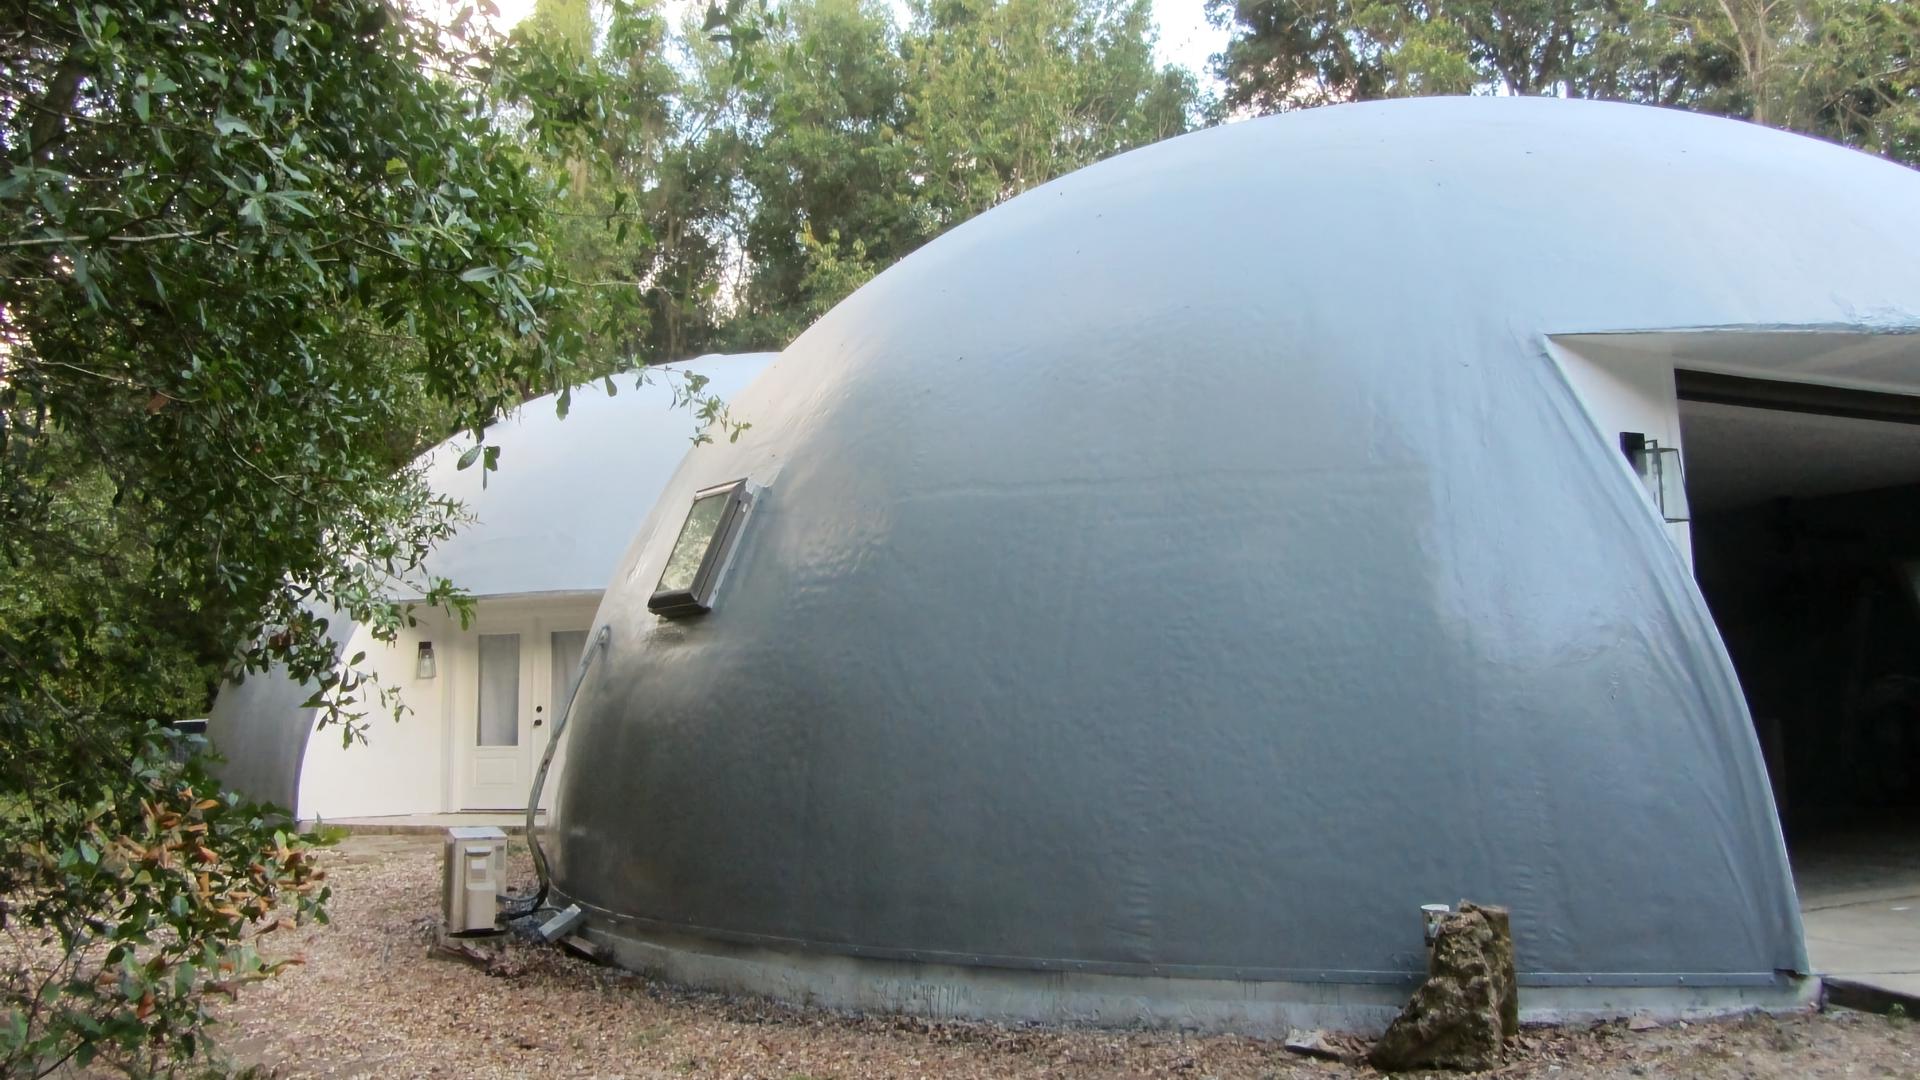
For any surface imperfections, wrinkles, or holes, the ProGuard primer is mixed with cork powder to form a thick paste which is then applied by hand (left). The finished, primed twin domes reminded me of something else (right).
Conclusion
Overall, I am very pleased with the resulting restoration of our Monolithic Dome. The inset doors were a special challenge, but nothing that couldn’t be overcome. We may eventually install J-shaped plastic drywall edging on the curved part of the dome just above the doorways to channel water to the edges—installing a channel of this sort was a recommendation from Gary at Monolithic, but so far the overhang is shedding the rain just fine. In the long term, we may convert the garage into one or two more bedrooms. The domes will probably still continue to evolve. For now, we are finishing the landscaping and other minor touch-ups to get the dome ready for our first rental.
